Most bathroom remodels tend to go wrong before a single tile is laid. Why?
People skip steps or do them in the wrong order. A misplaced wall. A flooded subfloor. A vanity that doesn’t fit.
These are real problems that happen when the remodeling sequence gets ignored.
This blog breaks down the exact order that professional contractors follow step by step, so those expensive mistakes never happen in the first place.
Why Getting the Remodel Order Right Matters?
Skipping steps or rushing ahead costs money.
When work gets done out of order, walls get opened twice, floors get damaged, and timelines stretch for weeks. That’s rework, and it’s completely avoidable.
Getting the sequence right keeps bathroom remodel and decor costs under control from day one.
It protects the subfloor, the walls, and the plumbing from accidental damage during other tasks.
It sets a clear path. Every trade plumber, electrician, tiler knows exactly when to show up and what to expect.
That’s what keeps a renovation running smoothly, start to finish.
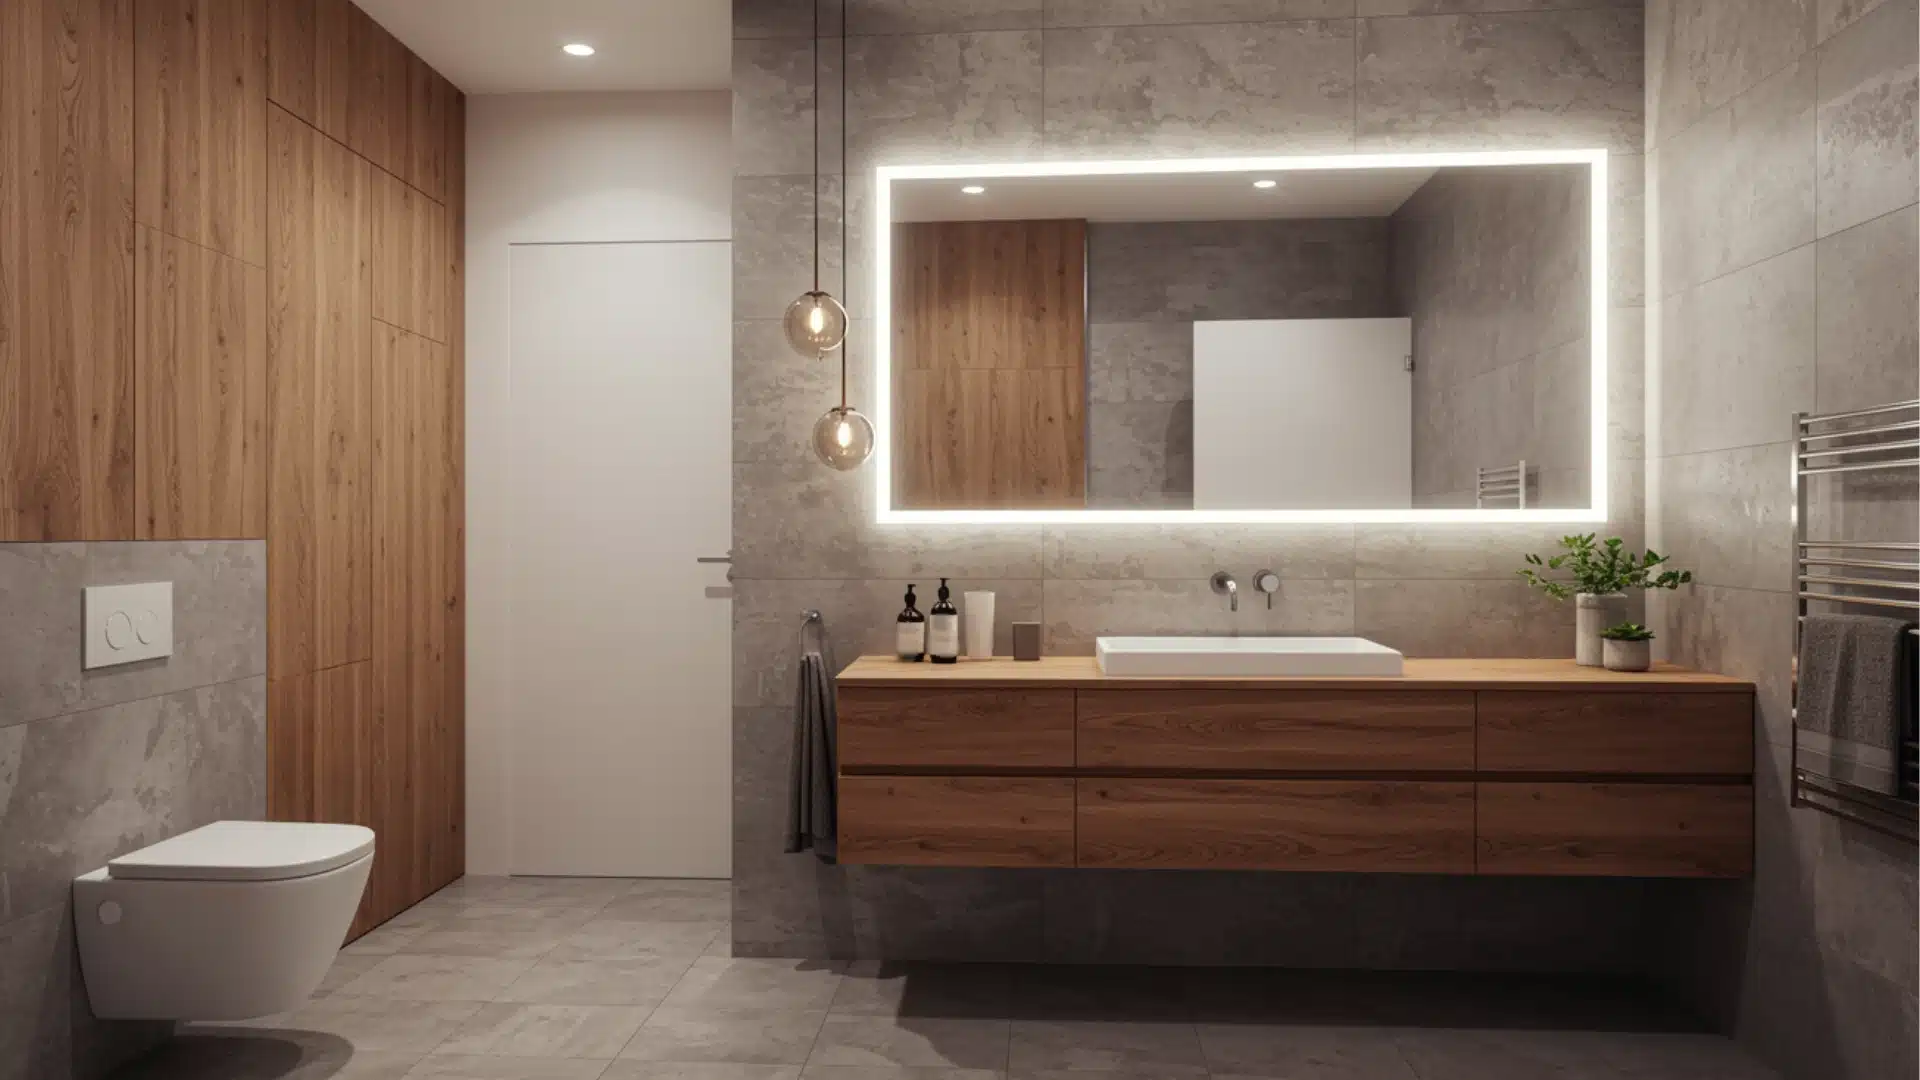
Planning Comes First: Design Your Space with Purpose and Style
A successful bathroom remodel starts long before the first wall comes down; it starts with a solid plan.
Set a realistic budget:
Factor in unexpected costs such as water damage, outdated wiring, or repairs before finalizing the numbers.
Timeline expectations:
Most remodels take 2 to 3 weeks, but complex bathroom remodels, like double vanities, can run longer.
Permits and approvals:
Structural changes, plumbing reroutes, and electrical upgrades always require a permit before any work begins.
Hiring contractors vs DIY:
Smaller jobs are suitable for DIY; licensed professionals should always handle plumbing, electrical, and tiling work.
Layout optimization:
A well-planned layout keeps traffic flow smooth and makes the bathroom feel larger than it actually is.
Material selection:
Porcelain tiles, quartz countertops, and water-resistant paint balance durability with style for long-lasting results.
Popular shower remodel ideas to consider:
Frameless glass enclosures, built-in niches, and rainfall showerheads are worth planning into the budget early.
Step-by-Step Bathroom Remodel Order You Should Follow
Every step in a bathroom remodel builds on the previous one.
Follow this sequence closely to keep work clean, efficient, and avoid costly do-overs.
Step 1: Demolition and Prep Work
Start by removing the toilet, vanity, and fixtures.
Then strip tiles and drywall carefully to expose the subfloor and wall framing underneath. Wear protective gear throughout demolition.
Seal doorways to contain dust and debris, and dispose of materials properly before moving forward.
Step 2: Plumbing and Electrical Rough-Ins
Once the walls are open, update the old pipes and wiring.
This is the right time before anything gets covered back up. Decide on light fixture placements and exhaust fan locations now.
Moving them later means reopening walls and wasting money.
Step 3: Structural and Surface Work
Install new framing where needed, hang moisture-resistant drywall.
Apply a waterproofing membrane in wet areas before any surface work begins. An uneven floor leads to cracked tiles later.
Level the subfloor and smooth the walls completely before any installation starts.
Step 4: Tiling and Flooring Installation
Most contractors lay floor tiles first. It creates a clean base and makes wall tile alignment much easier to manage.
Apply a waterproof membrane behind the shower wall tiles and around the tub area. Skipping this step leads to water damage behind the walls.
Step 5: Installing Fixtures and Features
Set the bathtub in place first, then install the vanity and toilet. Each fixture connects to the rough-in plumbing completed in an earlier step.
Install the shower pan or base first, then the walls, and lastly the fixtures, such as the valve, showerhead, and door.
Step 6: Painting, Lighting, and Final Touches
Always paint after tiling and fixture installation.
This avoids touch-ups and keeps the finish clean and sharp throughout the space. Hang mirrors, towel bars, and shelving last.
These finishing details bring the whole bathroom together without getting in the way of earlier work.
Before and After Bathroom Remodel
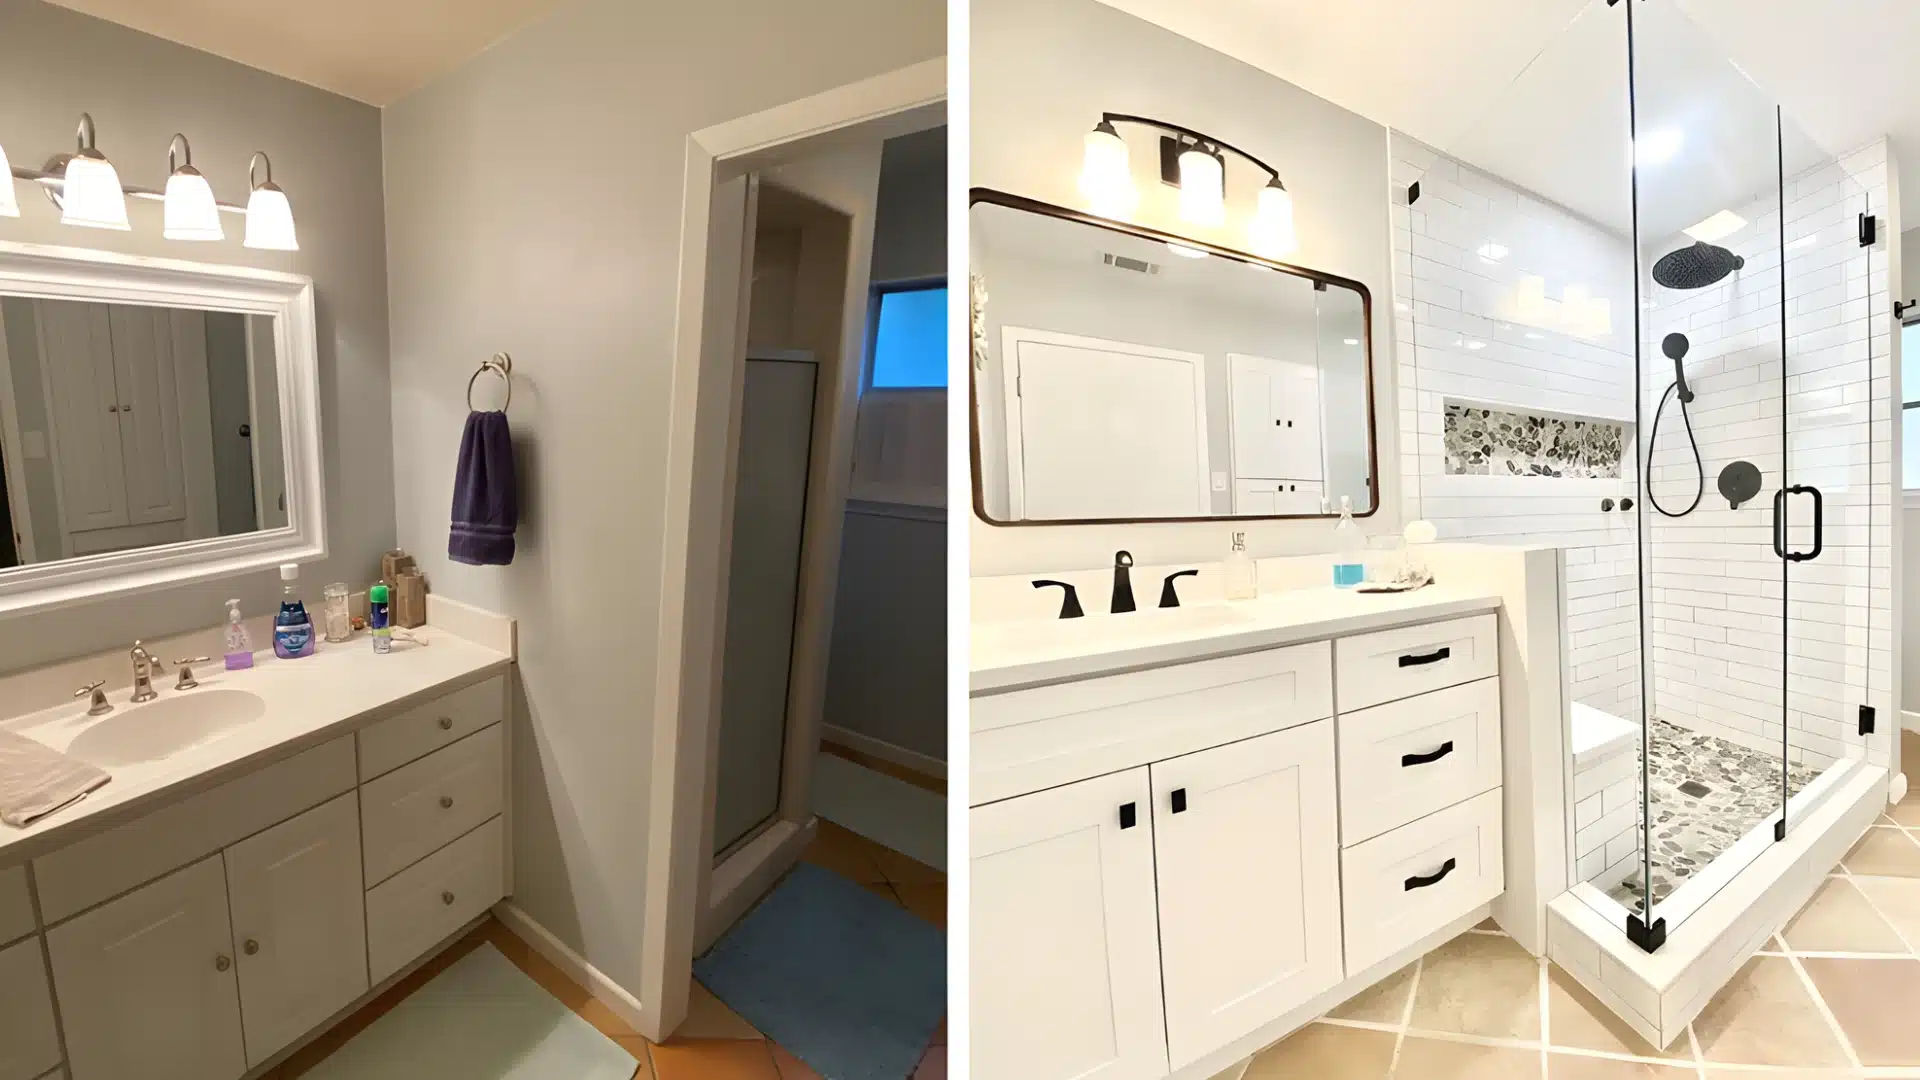
Seeing a before-and-after remodel side by side tells the full story of what good planning can achieve.
A cracked tile floor becomes polished porcelain. A dark, cramped layout opens up with better lighting and a glass shower enclosure. An outdated vanity gets replaced with a clean, modern unit.
The difference isn’t always about spending more. It’s about making smart choices in the right order.
Timeline Breakdown and Common Mistakes
| Stage | Estimated Time | Common Mistakes that Can Ruin the Remodel Timeline |
|---|---|---|
| Demolition & Prep | 1-2 days | Not disposing of debris properly |
| Plumbing & Electrical | 2-3 days | Skipping permits for electrical work |
| Structural & Surface Work | 2-3 days | Rushing drywall before waterproofing |
| Tiling & Flooring | 3-5 days | Laying tiles on an uneven floor |
| Fixture Installation | 2-3 days | Installing the toilet before the flooring is done |
| Painting & Final Touches | 1-2 days | Painting before the grout fully dries |
| Total | 11-18 days | Rushing any stage causes costly rework |
How to Ensure a Smooth and Stress-Free Remodel
A little preparation goes a long way in keeping a remodel on track.
Book contractors at least four to six weeks in advance.
Delays occur when trades aren’t available on short notice. Keep a contingency fund of 10-15% of the budget. Unexpected issues like water damage or outdated wiring happen more often than expected.
Make all material selections before work begins. Last-minute changes are the number one cause of project delays.
Final Thoughts
A bathroom remodel done in the right order saves time, money, and a lot of stress.
From setting a budget and pulling permits to laying tiles and hanging the final mirror, every step connects to the next. Skipping even one stage can push the entire project off track.
With a clear sequence in place, the process is far more manageable than most people expect.
Start with a solid plan, stick to the order, and make material choices early. The result will speak for itself.
Frequently Asked Questions (FAQ’s)
1. What is the 30% Rule in Remodeling?
Never spend more than 30% of the home’s total value on a bathroom remodel.
2. What Not to do in A Bathroom Remodel?
Never skip permits, rush tiling, or install fixtures before the flooring is fully complete.
3. What is a Realistic Budget for a Bathroom Remodel?
Most bathroom remodels cost between $6,000 and $15,000, depending on size and materials.
4. What is the 10-10 Bathroom Rule?
A standard bathroom should measure at least 10 square feet per fixture for comfort.
5. What is the Golden Rule for Bathroom Layouts?
Always place the toilet away from the door for maximum privacy and functionality.