Skip to content
  • Architectural Styles
  • Home Design Elements
  • Exterior Inspirations
  • Interior Inspirations
  • Architectural Styles
  • Home Design Elements
  • Exterior Inspirations
  • Interior Inspirations
Subscribe

Home Ā» How to Paint Interior Doors Like a Pro

  • Home Design Elements

How to Paint Interior Doors Like a Pro

painting interior doors

Table of Contents

  • Natalia Flores
  • October 13, 2025

Interior doors are the forgotten walls of your home. They hang there quietly while you focus on everything else. Yet a simple paint job can wake up your whole space.

Forget hiring professionals or stressing about perfect results. Painting different interior doors isn’t rocket science. With some basic supplies and a free weekend, you can give those doors new life.

And who knows? You might actually enjoy getting your hands dirty.

Best Paints for Painting Interior Doors

Choosing the right paint makes the difference between a door that looks fresh for years and one that chips after a few months. Interior doors get touched, slammed, and scratched daily.

So, skip the cheapest option and opt for something that can handle real-life situations.

Latex Paint

Water-based and forgiving for beginners. Cleans up with soap and water, dries fast, and won’t yellow over time. Perfect for most interior doors, especially if you’re painting over existing latex paint.

Oil-Based Paint

The tough guy of door paint. Takes longer to dry, but creates a hard, smooth finish that resists wear. Great for high-traffic areas, such as front halls and children’s rooms, where doors receive extra abuse.

Chalk Paint

Trendy and textured. Gives doors a vintage, matte look without much prep work. But it needs a protective wax coat to prevent damage from everyday use.

Semi-Gloss Finish

The sweet spot for painting interior doors. Easy to clean, reflects light nicely, and hides minor imperfections. Avoid flat paint on doors unless you want to repaint them every year.

Tools & Materials Checklist

CategoryItems
Painting ToolsMini roller (10 mm nap), angled brush (2.5″), paint bucket (with liner & brush magnet), smooth-surface roller (5 mm nap for flat doors)
Prep SuppliesPainter’s tape, utility knife, sanding sponge, putty knife, rag/paper towel, shims
ProtectionCardboard, paper, or drop cloth (for floor)
Paint AdditivesFloetrol or clean water
OptionalScrewdriver (for removing doorknob)

Step-by-Step Instructions for Painting Interior Doors

Time to get your hands dirty. This isn’t about following every rule perfectly; it’s about getting the job done right without overthinking it.

Break the process into simple steps and tackle them one at a time. Before you know it, you’ll be admiring doors that look like they came straight from a home magazine.

Step 1. Keep the Door on Its Hinges
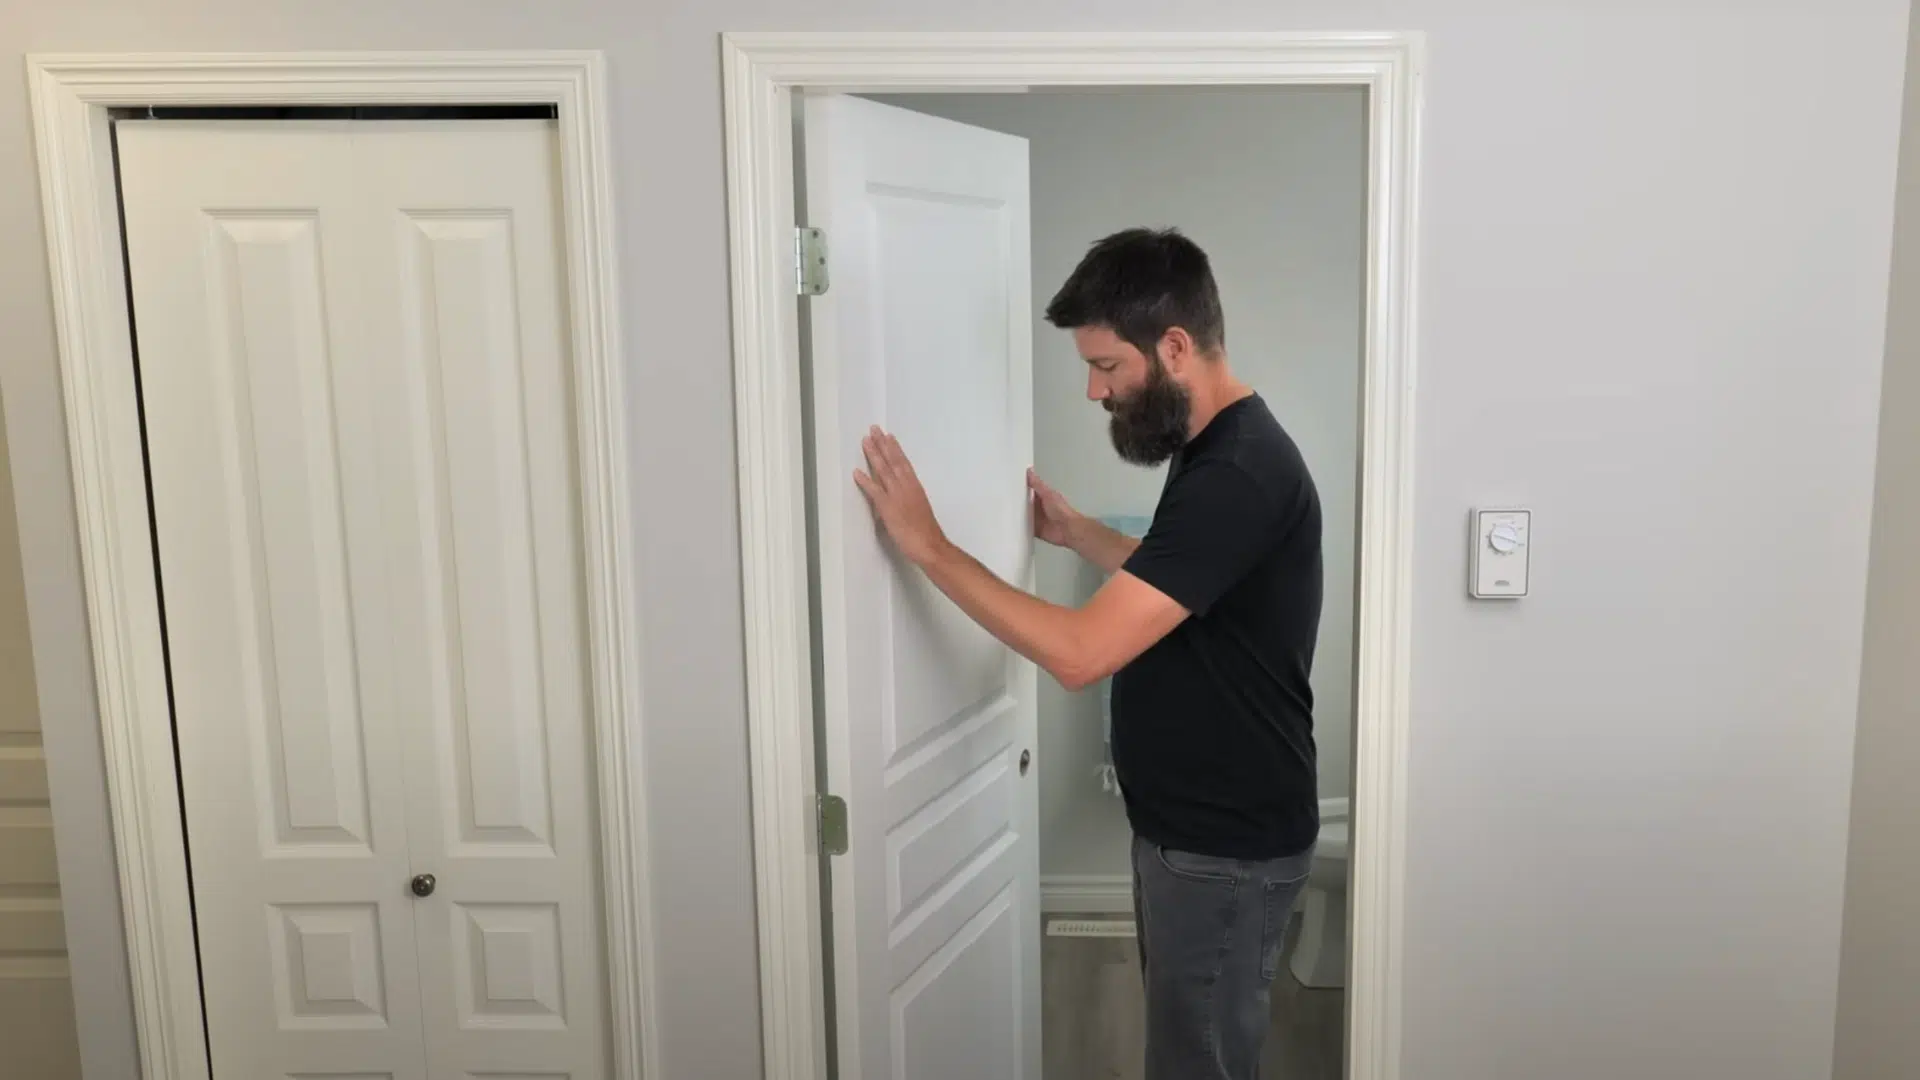
keep the door on the hinges

Leave the door attached so you can paint all sides at once. To keep it steady, use small shims at the edges to prevent it from wobbling. This way, you won’t have to wait for one side to dry before tackling the next.

Step 2. Prepare Your Workspace
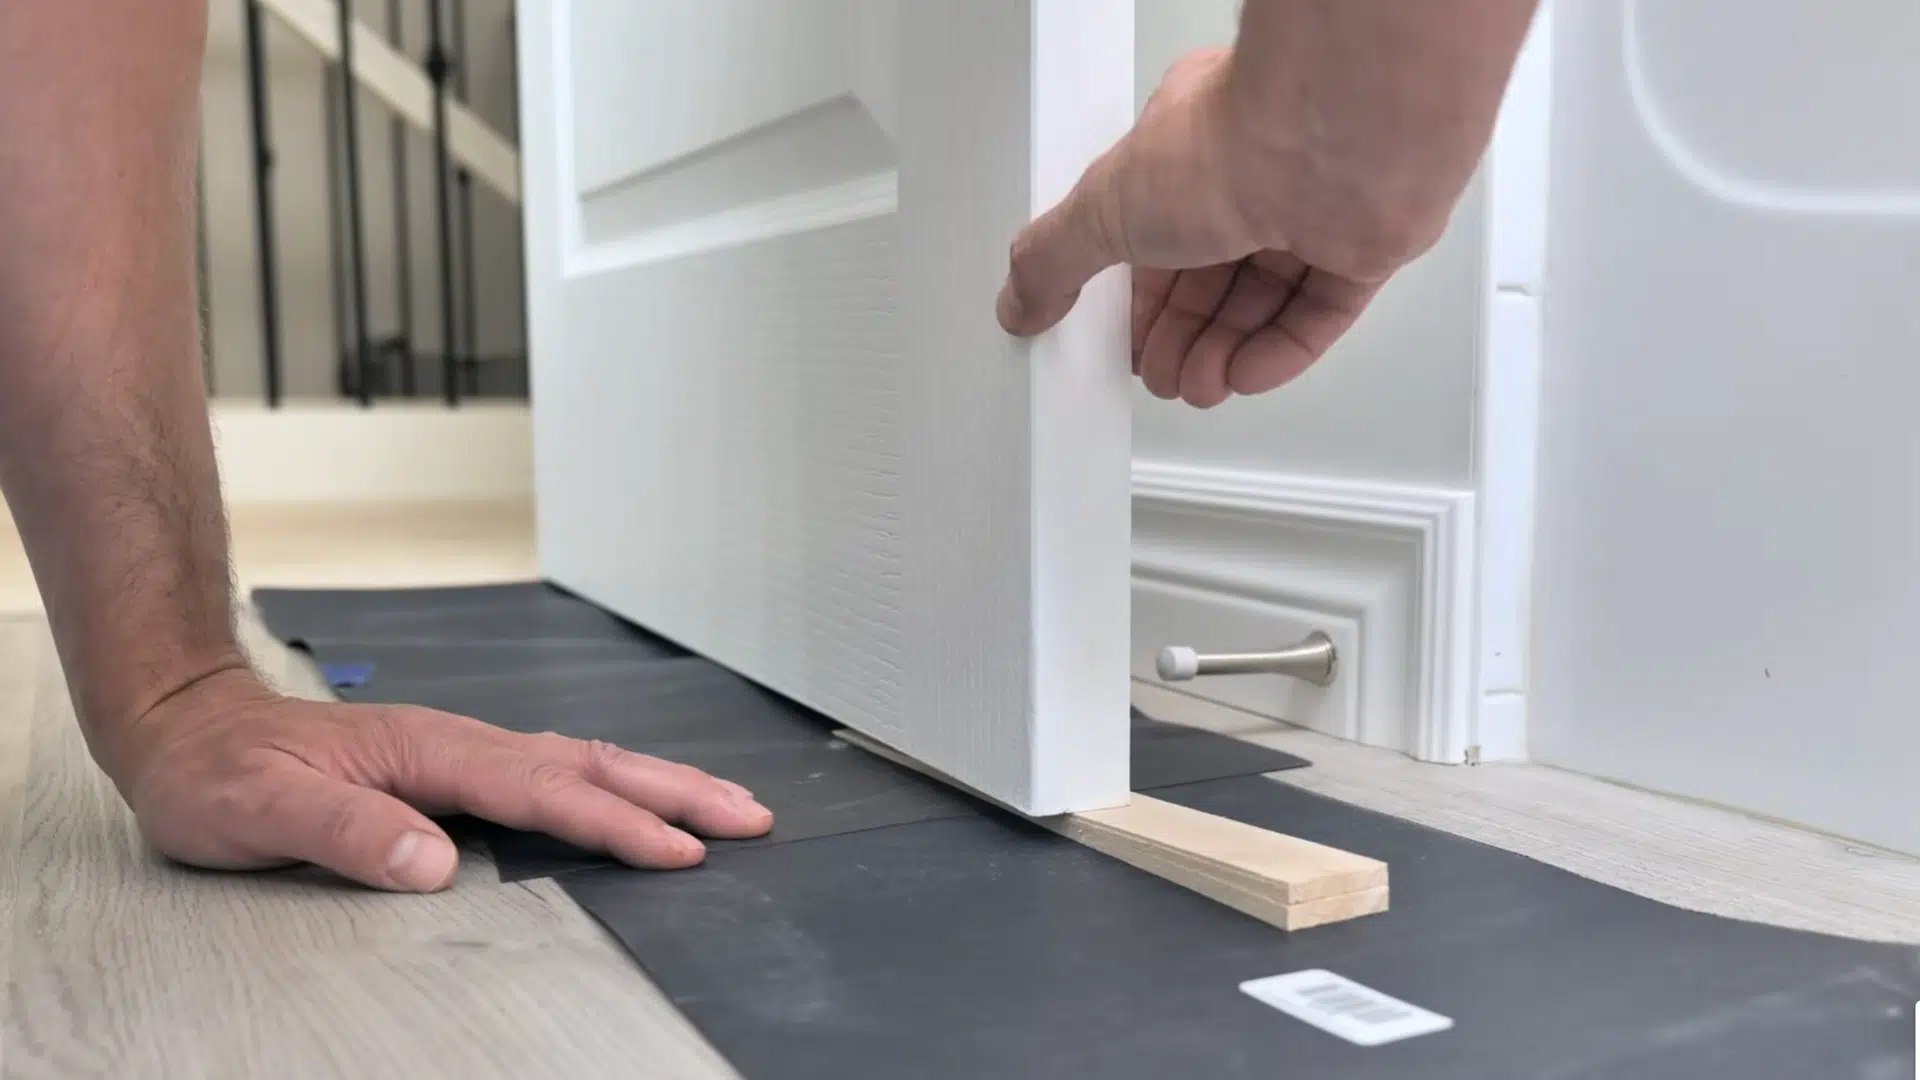
prepare the workspace

Lay a piece of cardboard, paper, or a drop cloth at the bottom of the door to protect your floors from drips. Have all your supplies, paint, brushes, roller, tape, and shim, within easy reach before you begin.

A little setup goes a long way in keeping things smooth.

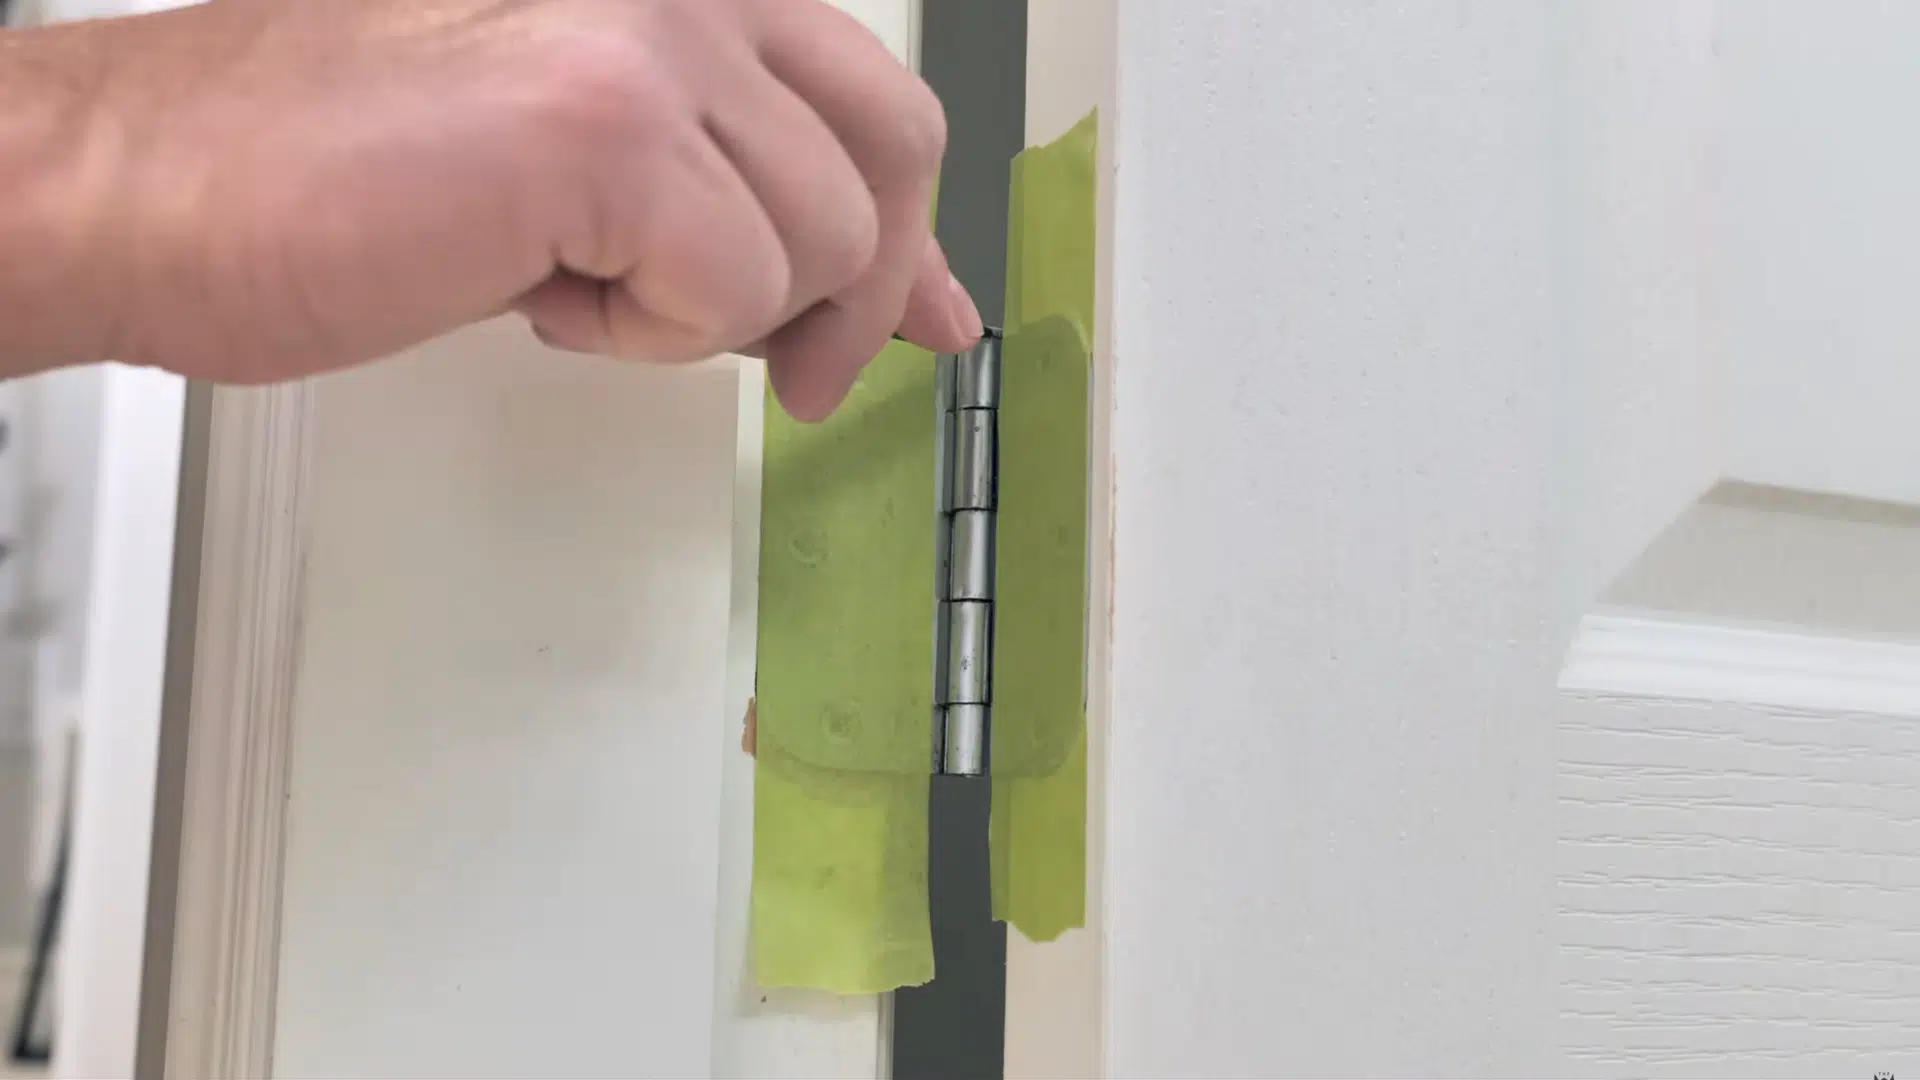
Step 3. Protect Hardware and Hinges
prepare the workspace

Use painter’s tape to carefully cover the hinges. Cut the tape neatly with a utility knife so it sits flush along the hinge edges. If possible, remove the doorknob to achieve the cleanest finish; if not, secure it with tape.

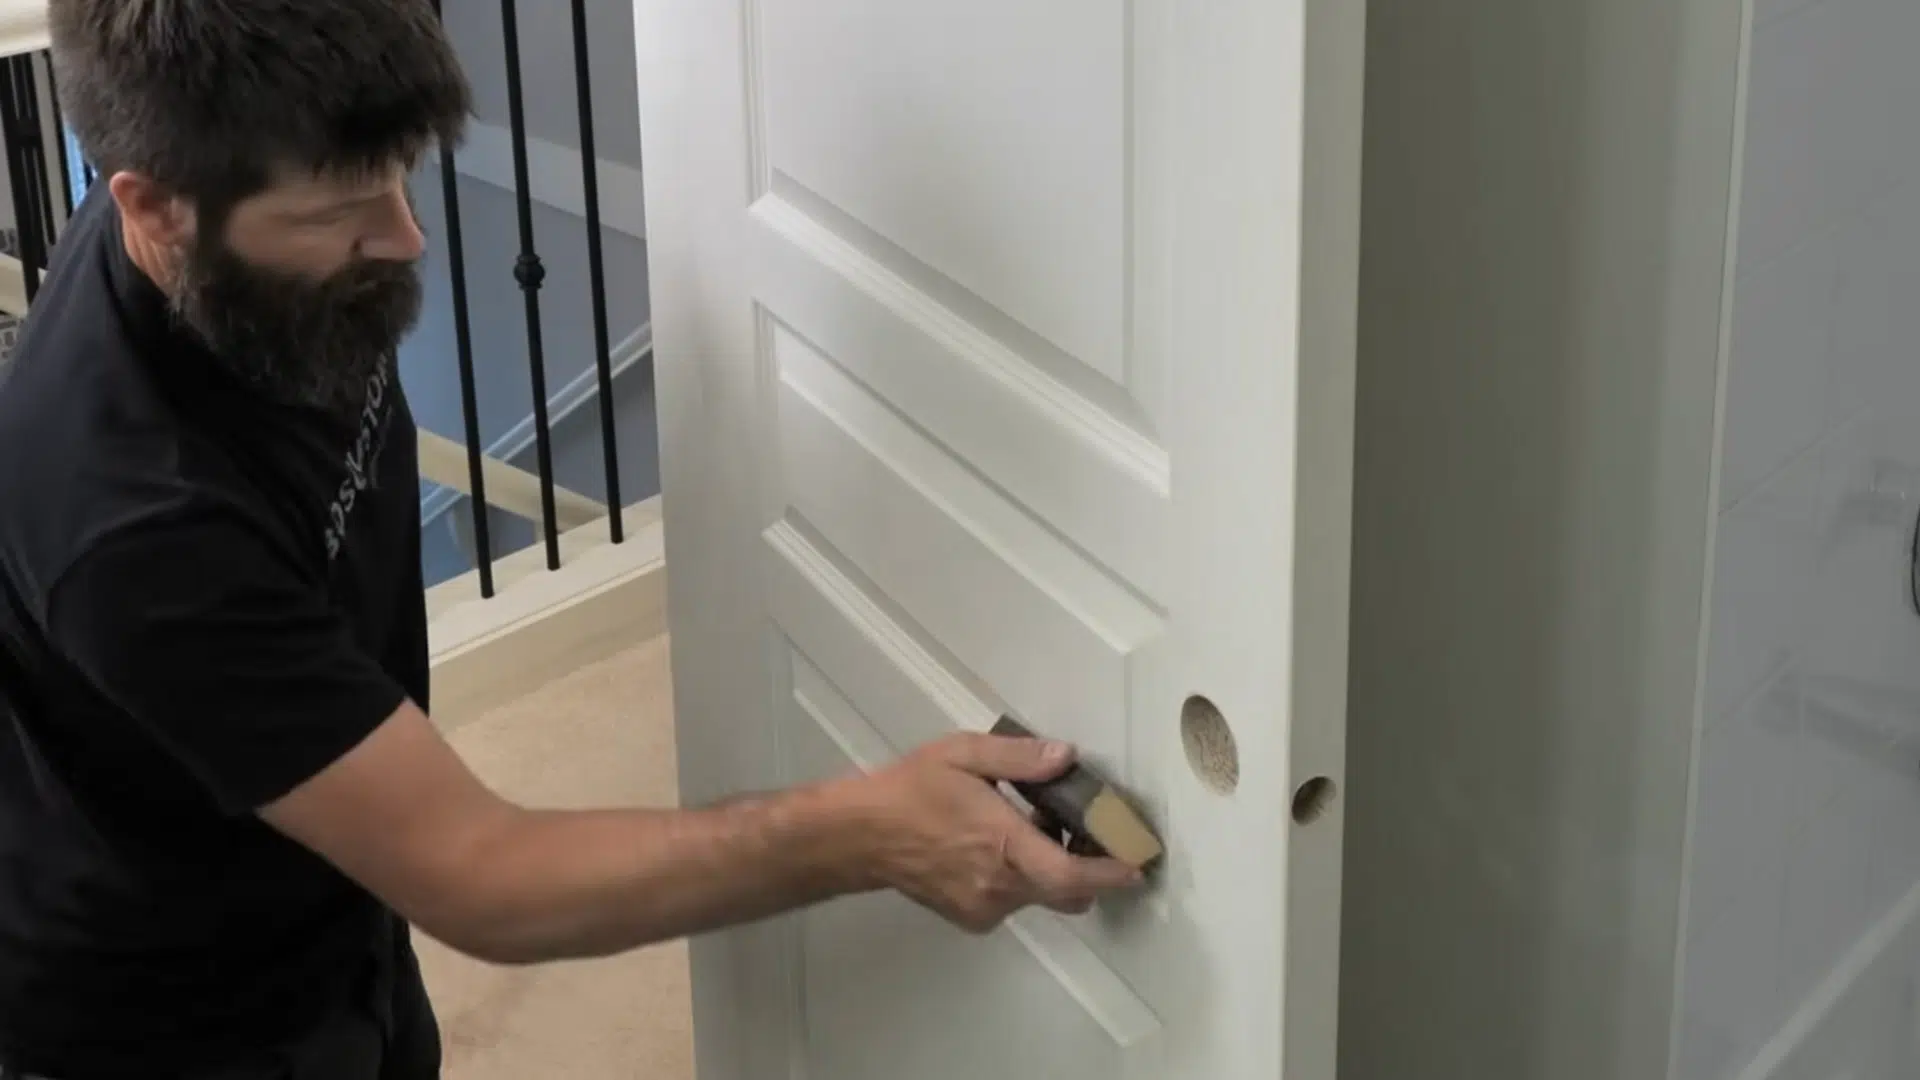
Step 4. Smooth the Surface
smooth the surface

Lightly sand the door with a sanding sponge to even out rough spots or scrape away lumps with a putty knife. Wipe away dust using a slightly damp rag or paper towel. This creates the perfect base for your fresh coat of paint.

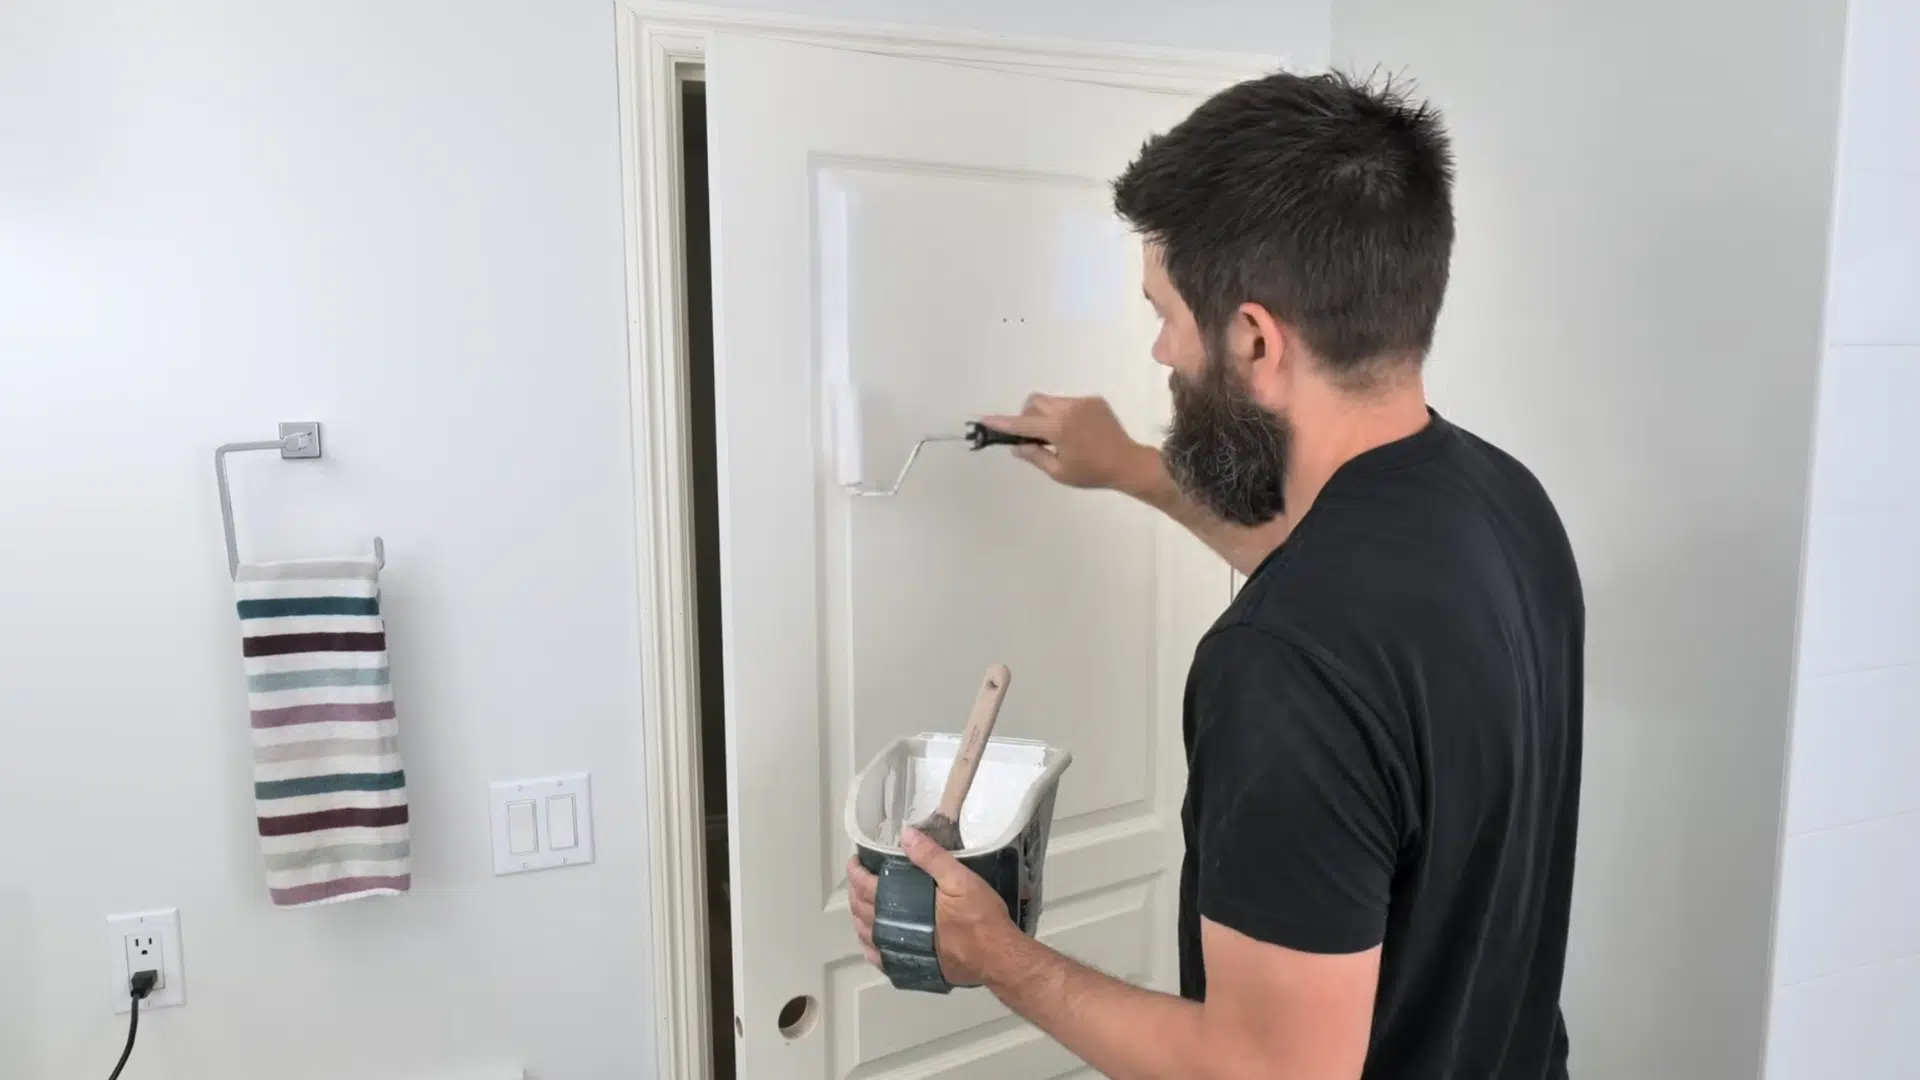
Step 5. Apply Paint Efficiently
apply paint affectively

Start by painting the edges with a brush, then move to the panels or flat surfaces. Use a mini roller for broad areas and an angled brush for corners and grooves.

Work with steady strokes, aiming for an even, medium-thick coat. If you’re not making a dramatic color change, one coat may be enough.

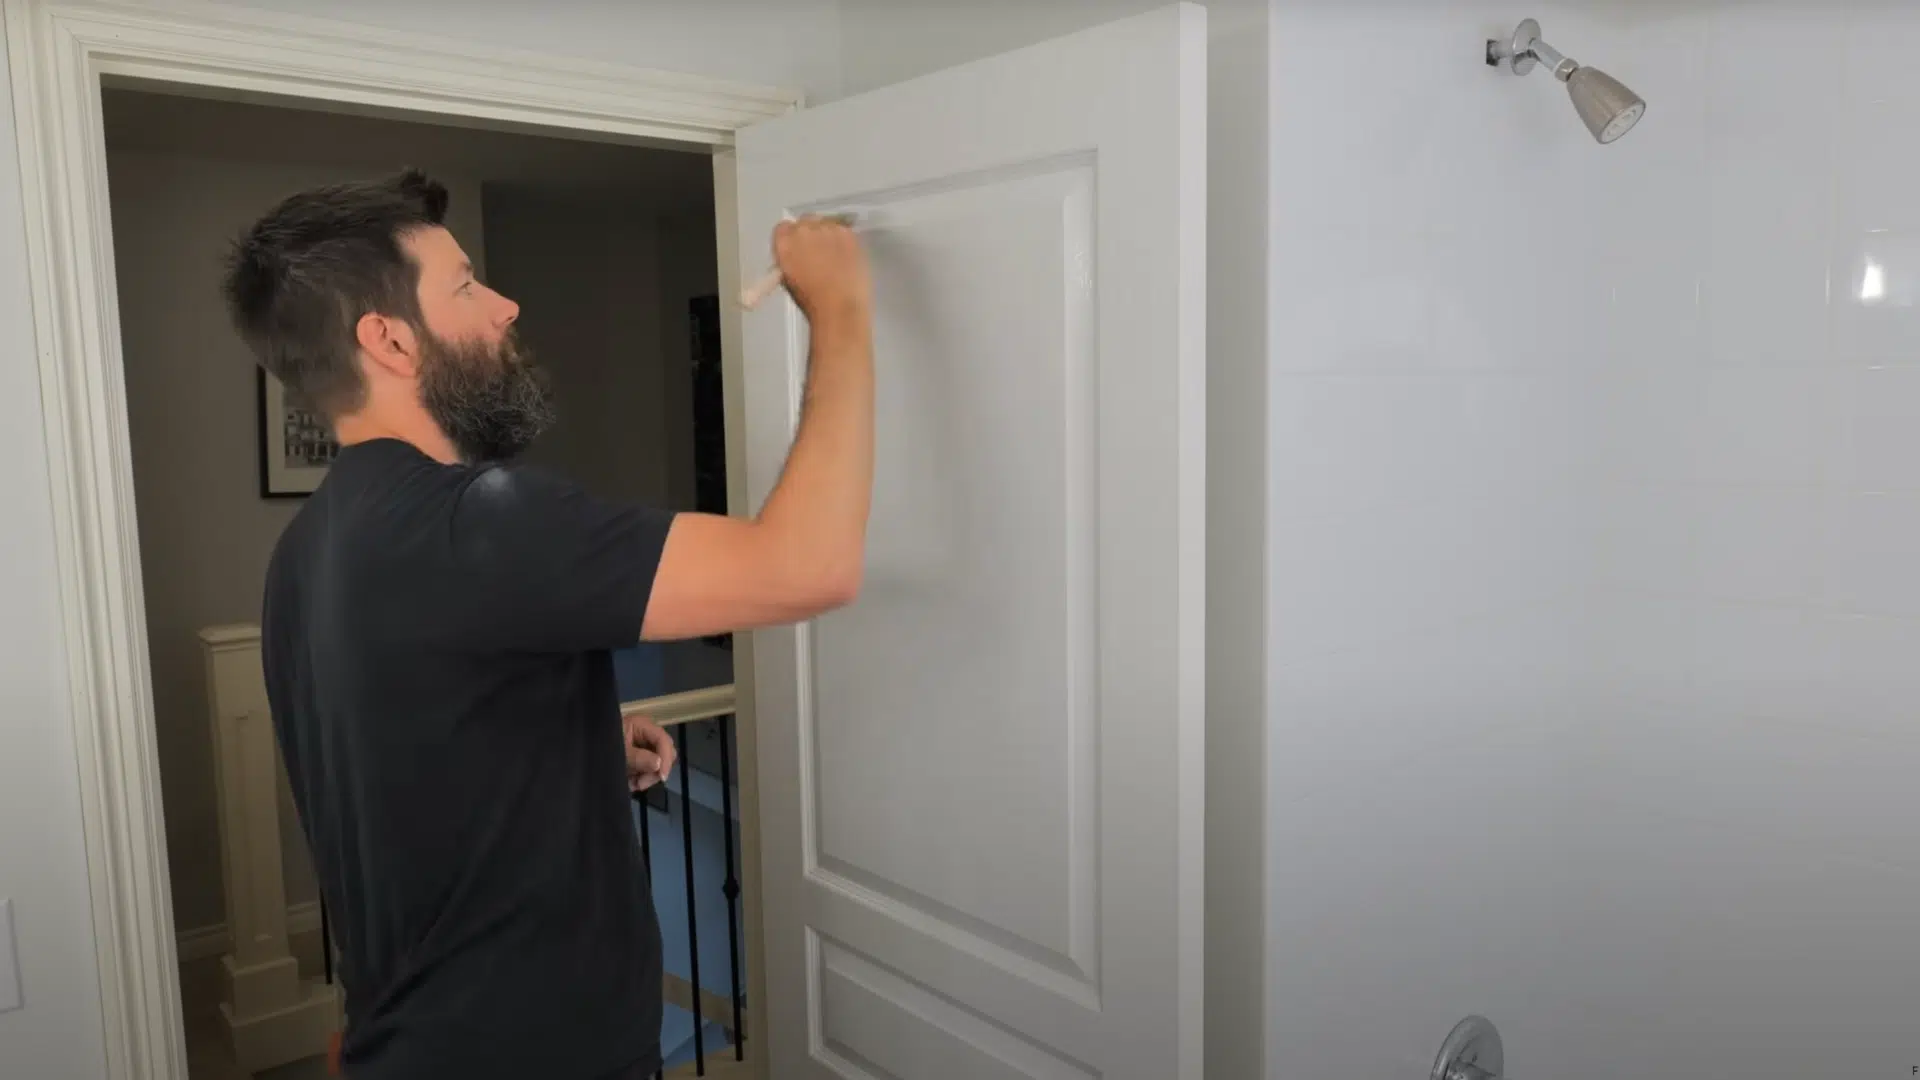
Step 6. Finish with a Brush for Texture
finish with brush for texture

On paneled or textured doors, lightly brush over the painted surface while the paint is still wet, following the wood grain. This smooths out roller marks and gives a professional look.

For flat doors, use a smooth-surface roller for an even finish instead

Step 7. Add a Paint Conditioner for Extra Time
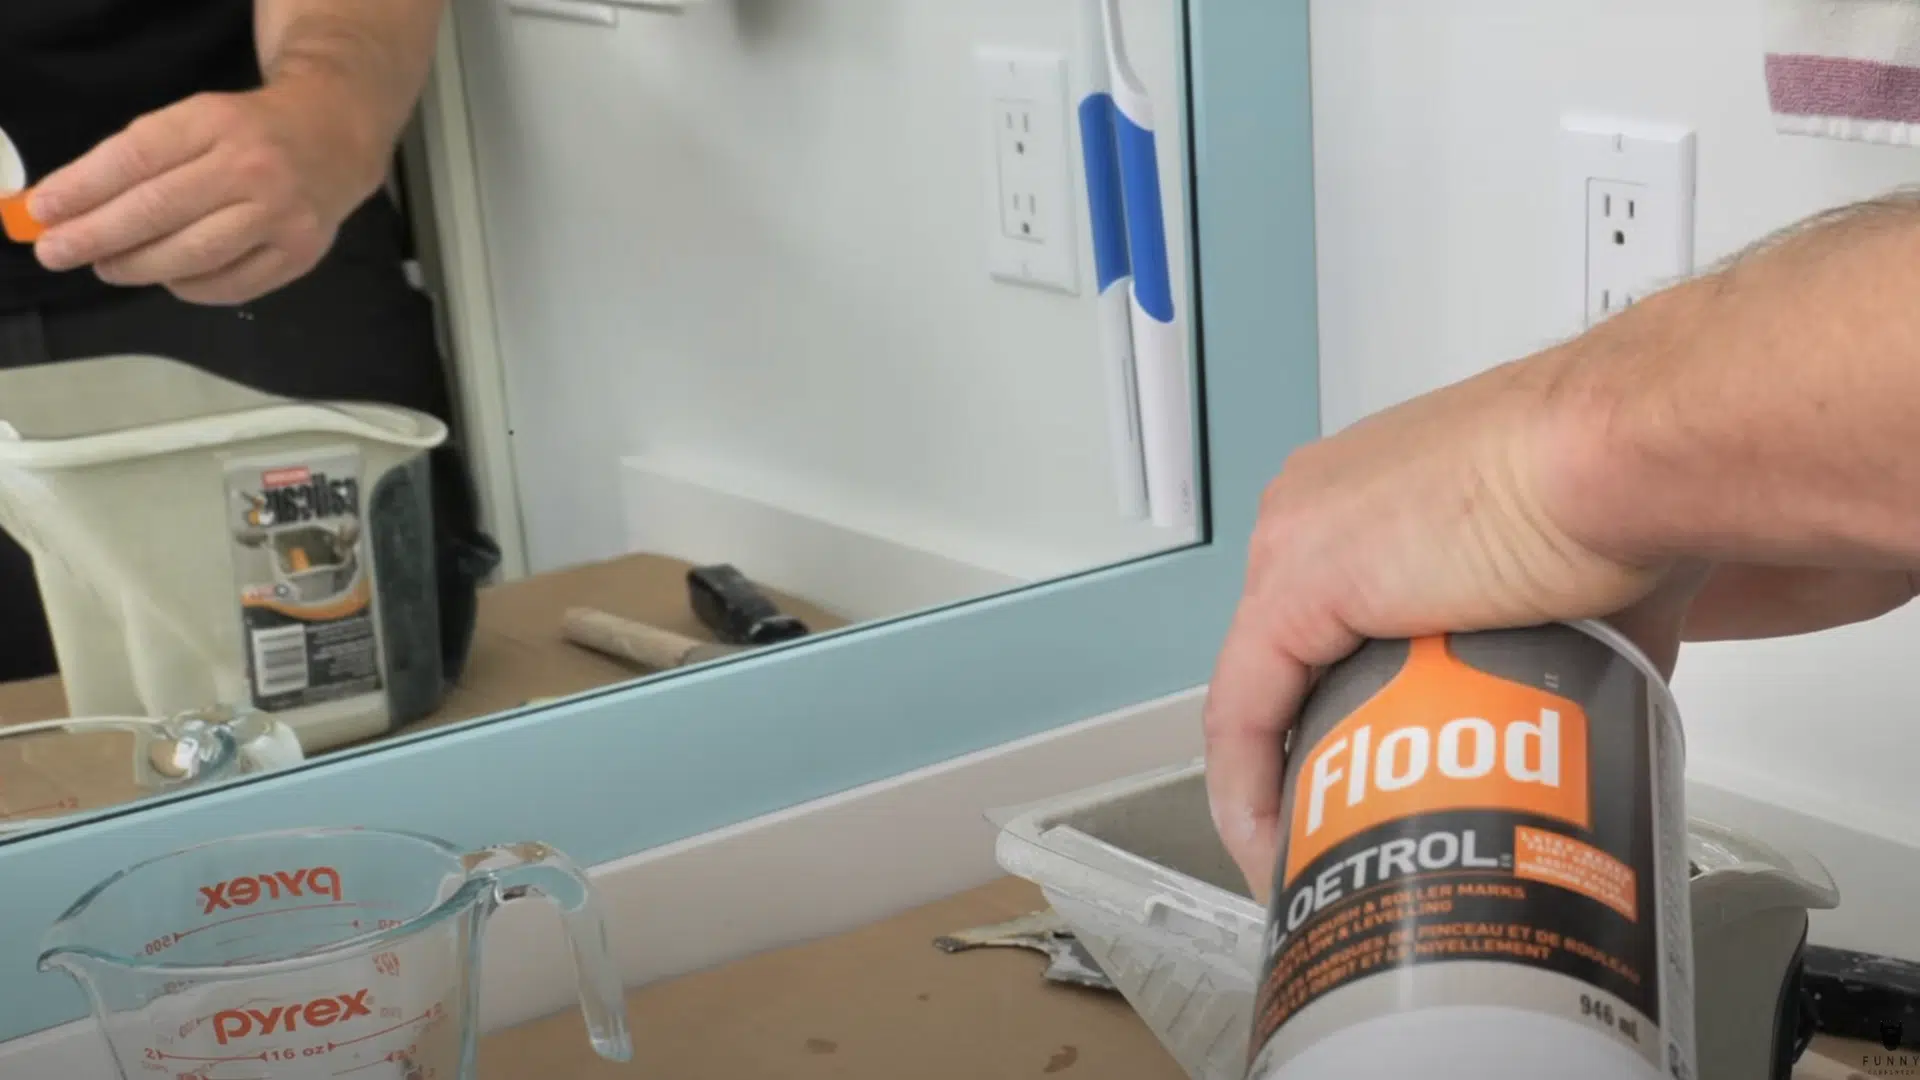
add a paint conditioner for extra time

Mix a product like Floetrol (or a small amount of water) into your paint to slow down drying. This gives you more working time, especially helpful for detailed doors with multiple grooves and grain directions.

For a detailed explanation, check out the video below:

Tips for Painting Doors Like a Pro

Small details separate amateur paint jobs from professional-looking results. These tricks won’t cost extra money, but they’ll save hours of frustration and give you doors worth showing off.

  • Remove the door completely: Paint it flat on sawhorses instead of hanging it. No drips, better coverage, and your back will thank you later.
  • Sand lightly between coats: A quick scuff with fine sandpaper helps the next coat stick better. Wipe clean with a damp cloth before applying more paint.
  • Paint in thin layers: Two thin coats are better than one thick coat every time. Thick paint runs, drips, and looks bumpy when it dries.
  • Use a small roller for panels: Brushes leave marks, but a 4-inch foam roller gives smooth, even coverage on flat door panels.
  • Don’t forget the edges: The top and bottom edges of doors are prone to collecting dust and moisture. A quick coat there prevents peeling and keeps the door looking finished.

Conclusion

Fresh paint turns tired doors into focal points that make your whole house feel updated. The process of painting interior doors takes patience, not perfection.

Choose high-quality paint, take your time with the preparation work, and avoid rushing between coats.

Your doors work hard every day. Give them a makeover that can handle the job. With the right approach, this weekend project will continue to look good for years to come.

Plus, you’ll have bragging rights every time someone compliments your handiwork.

Leave a Reply Cancel reply

Your email address will not be published. Required fields are marked *

Natalia Flores

About the Author

Natalia Flores is an interior designer with over 7 years of experience transforming spaces into functional, beautiful homes. Her interest in design began when she helped her family renovate their first home, where she realized how much small details like lighting, textures, and finishes shape the comfort of a room. With years of experience exploring design trends and functional choices, Natalia shares ideas that make homes more thoughtful and inviting.

Date

  • October 13, 2025

Published Date

  • October 13, 2025

Read

5 min

Table of Contents

Popular Posts

A Studio McGee inspired living room featuring a sofa, a rustic wooden coffee table, and a gray mid century modern armchair

6 Studio McGee Living Room Ideas Worth Stealing

Read More : 6 Studio McGee Living Room Ideas Worth Stealing
Five open cans of red, blue, yellow, green, and white paint are arranged next to two paintbrushes on a light surface

Does Paint Go Bad? Can You Use Old Paint?

Read More : Does Paint Go Bad? Can You Use Old Paint?
Dark wood double doors with lattice glass panels sit slightly open on a marble floor showing a bright room in the back showing how wide is a standard door should be

How Wide is a Standard Door? Sizes for Every Door

Read More : How Wide is a Standard Door? Sizes for Every Door
A modern room in a bathhouse featuring tiered, curving dark wood benches, accent lighting, facing a large window

First Bathhouse Visit: What Actually Happens Inside?

Read More : First Bathhouse Visit: What Actually Happens Inside?

Related Posts

Modern living room with a stone fireplace and built-in shelves and a gas fire.
  • 08/05/2026
  • Home Design Elements
  • 08/05/2026
  • Home Design Elements
Read More : 12 Modern Fireplace Accent Wall Ideas for Your Home

12 Modern Fireplace Accent Wall Ideas for Your Home

The wall around your fireplace gets noticed the moment anyone

Read More : 12 Modern Fireplace Accent Wall Ideas for Your Home
Light-colored carpet with large brown coffee stains and uneven discoloration across the surface.
  • 08/05/2026
  • Home Design Elements
  • 08/05/2026
  • Home Design Elements
Read More : How to Remove Coffee Stain from Carpet (Old and New Stains)

How to Remove Coffee Stain from Carpet (Old and New Stains)

You just spilled coffee on your carpet, and now you

Read More : How to Remove Coffee Stain from Carpet (Old and New Stains)
Double vanity bathroom with open cabinets and drawers organized using wire baskets and bins.
  • 07/28/2026
  • Home Design Elements
  • 07/28/2026
  • Home Design Elements
Read More : Home Home Organization Hacks that Will De-Cultter Your Space in Minutes

Home Home Organization Hacks that Will De-Cultter Your Space in Minutes

A single overflowing drawer can turn into a cluttered space,

Read More : Home Home Organization Hacks that Will De-Cultter Your Space in Minutes
Beige three seat sofa with wooden frame in a modern living room
  • 07/21/2026
  • Home Design Elements
  • 07/21/2026
  • Home Design Elements
Read More : What is a Sectional Sofa? Is it the Right Choice For You?

What is a Sectional Sofa? Is it the Right Choice For You?

Sofas, loveseats, chaises, and sectionals all look the same and

Read More : What is a Sectional Sofa? Is it the Right Choice For You?
White crib with a fitted mattress pillow folded blanket and teddy bear in a bright nursery
  • 07/18/2026
  • Home Design Elements
  • 07/18/2026
  • Home Design Elements
Read More : Crib Mattress Size and How to Get a Safe Fit?

Crib Mattress Size and How to Get a Safe Fit?

Bigger isn’t always better when it comes to crib mattresses.

Read More : Crib Mattress Size and How to Get a Safe Fit?
Apron Sink vs Farmhouse Sink Comparison
  • 07/18/2026
  • Home Design Elements
  • 07/18/2026
  • Home Design Elements
Read More : Apron Sink vs Farmhouse Sink – Complete Comparison

Apron Sink vs Farmhouse Sink – Complete Comparison

Two sinks, same deep basin, same exposed front, so why

Read More : Apron Sink vs Farmhouse Sink – Complete Comparison

As seen on

Buzzfeed
Elle Decor
Sfgate
boredpanda
Logo Image

Categories

  • Architectural Styles
  • Designers, Principles & Reviews
  • Exterior Inspirations
  • Home Design Elements
  • Interior Inspirations
  • Layout & Space Planning
  • Measurements & Standards
  • Architectural Styles
  • Designers, Principles & Reviews
  • Exterior Inspirations
  • Home Design Elements
  • Interior Inspirations
  • Layout & Space Planning
  • Measurements & Standards

Quick Links

  • Blogs
  • About Us
  • Contact Us
  • Privacy Policy
  • Blogs
  • About Us
  • Contact Us
  • Privacy Policy

Contact

Instagram Pinterest Envelope

©2023 - 2026 TheStyleSaloniste . All rights reserved.

Categories

  • Architectural Styles
  • Designers, Principles & Reviews
  • Exterior Inspirations
  • Home Design Elements
  • Interior Inspirations
  • Layout & Space Planning
  • Measurements & Standards
  • Architectural Styles
  • Designers, Principles & Reviews
  • Exterior Inspirations
  • Home Design Elements
  • Interior Inspirations
  • Layout & Space Planning
  • Measurements & Standards

Quick Links

  • Blogs
  • About Us
  • Contact Us
  • Privacy Policy
  • Blogs
  • About Us
  • Contact Us
  • Privacy Policy