Our carved pumpkin fell apart on our porch three days before Halloween last October, just as I was planning my party.
It’s the year I decided to decorate my porch with painted halloween pumpkins. No seeds, no smell, and nothing that is rotting through your decorations even before your party guests arrive.
The painted pumpkins will last longer; they can be placed both on your mantel and on your porch steps and will coordinate with your party theme.
Here’s how I paint mine and the ideas for you to try this Halloween season.
Why Paint Pumpkins Instead of Carving Them?
Carving looks great for one night, then it starts caving in on itself by day three. Painting solves a few problems carving cannot.
- They last weeks instead of days, since you are not cutting into the flesh
- Cleanup is a paper towel and some soap, not a bowl of pumpkin guts
- Kids can join in without anyone near a knife
- You get full control over color, so a pumpkin can match your porch or party theme instead of just glowing orange
- You can change the design partway through the season if the first one gets old
What Paint Works Best on Pumpkins?
Once you know why painting makes sense, the next question is what to actually use.
Acrylic craft paint is the easiest place to start. It sticks well to the pumpkin’s skin, dries fast, and comes in almost any color you would want for a face or pattern.
Chalk paint gives a flat, matte finish that works well for designs meant to look like stone or bone. It goes on thick, so it suits solid base coats better than fine lines.
Paint pens are what I reach for on detail work like whiskers, stitches, or small dots. They give more control than a brush, especially if your hands are not steady.
Spray paint covers a whole pumpkin fast and leaves an even finish, which is handy for metallic looks or a solid base before you add details on top. Do it outside or in a garage, since the smell lingers indoors.
A clear sealer is the step most people skip and then regret. Without it, paint can smear if the pumpkin sweats or gets touched a lot, especially outside in damp weather. One light coat of a matte or gloss sealer, once the paint is fully dry, keeps the design looking clean for weeks.
Halloween Painted Pumpkin Ideas
1. Classic Jack O’ Lantern Face
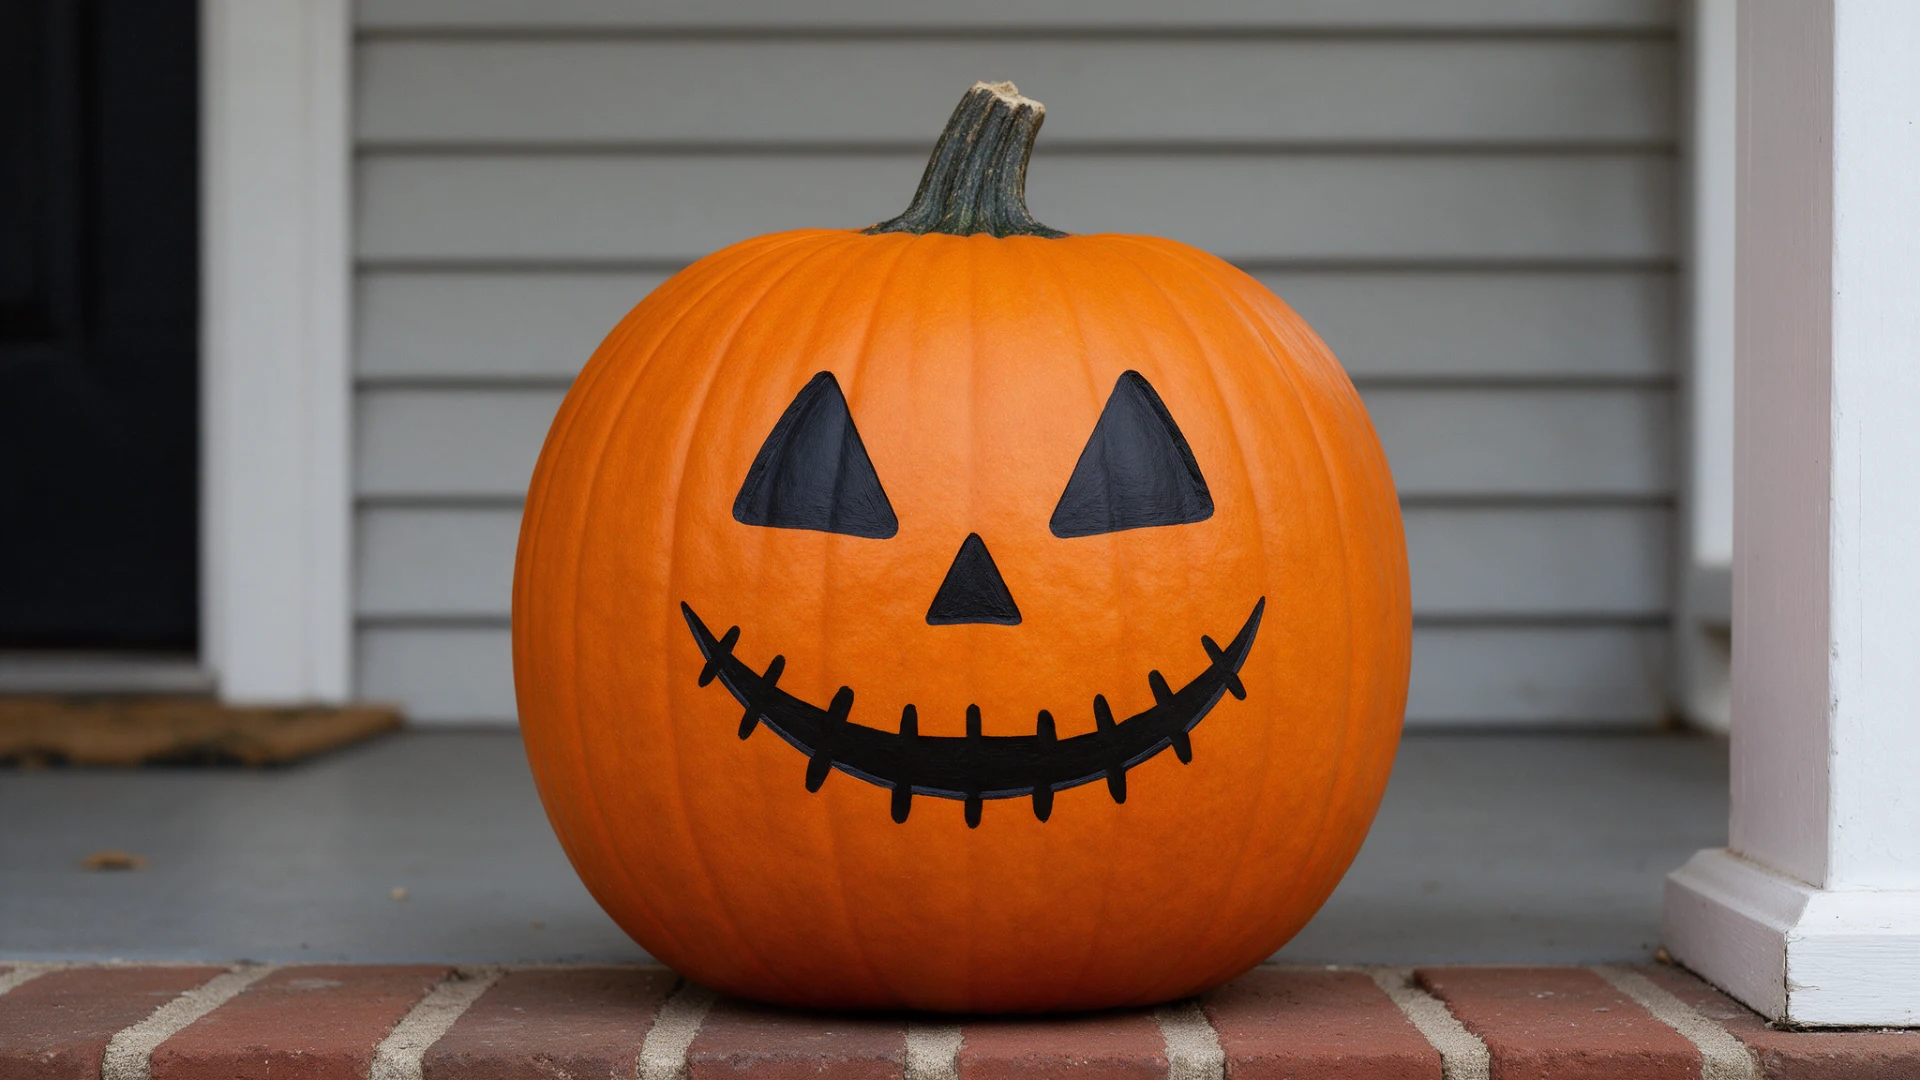
Paint the same triangle eyes and jagged smile you would normally carve, just with a brush instead of a knife.
This is the one I go back to every year because it works on any size pumpkin and any age of painter.
If you want it to look less flat, add a thin black outline around each shape once the base color has fully dried.
2. Black Cat Pumpkin
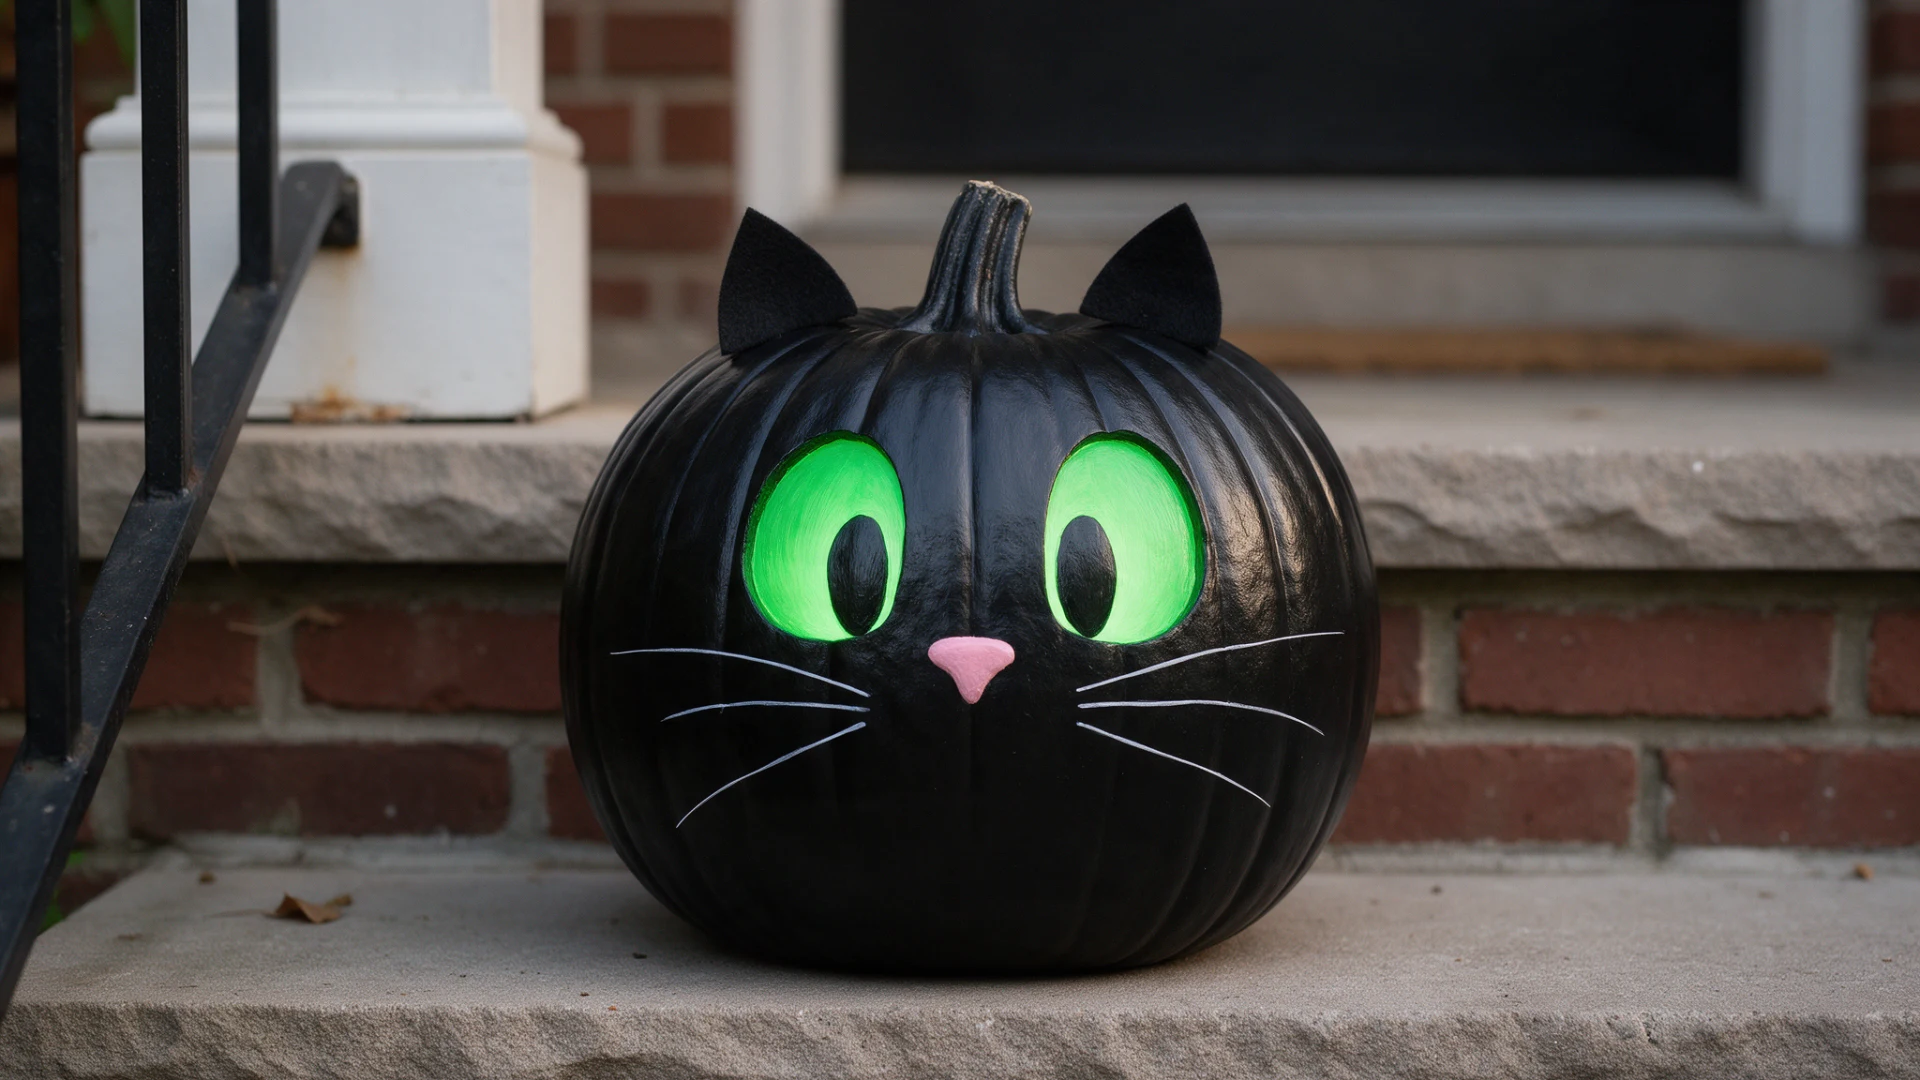
Two pointed ears near the top, a solid black face, and a few thin white whiskers are all this design needs.
It reads well from the street, so it earns its spot on a front porch better than smaller, more detailed designs do.
Paint the eyes in yellow or green rather than white. It makes the whole pumpkin look less like a blob and more like an actual cat.
3. Friendly Ghost Pumpkin
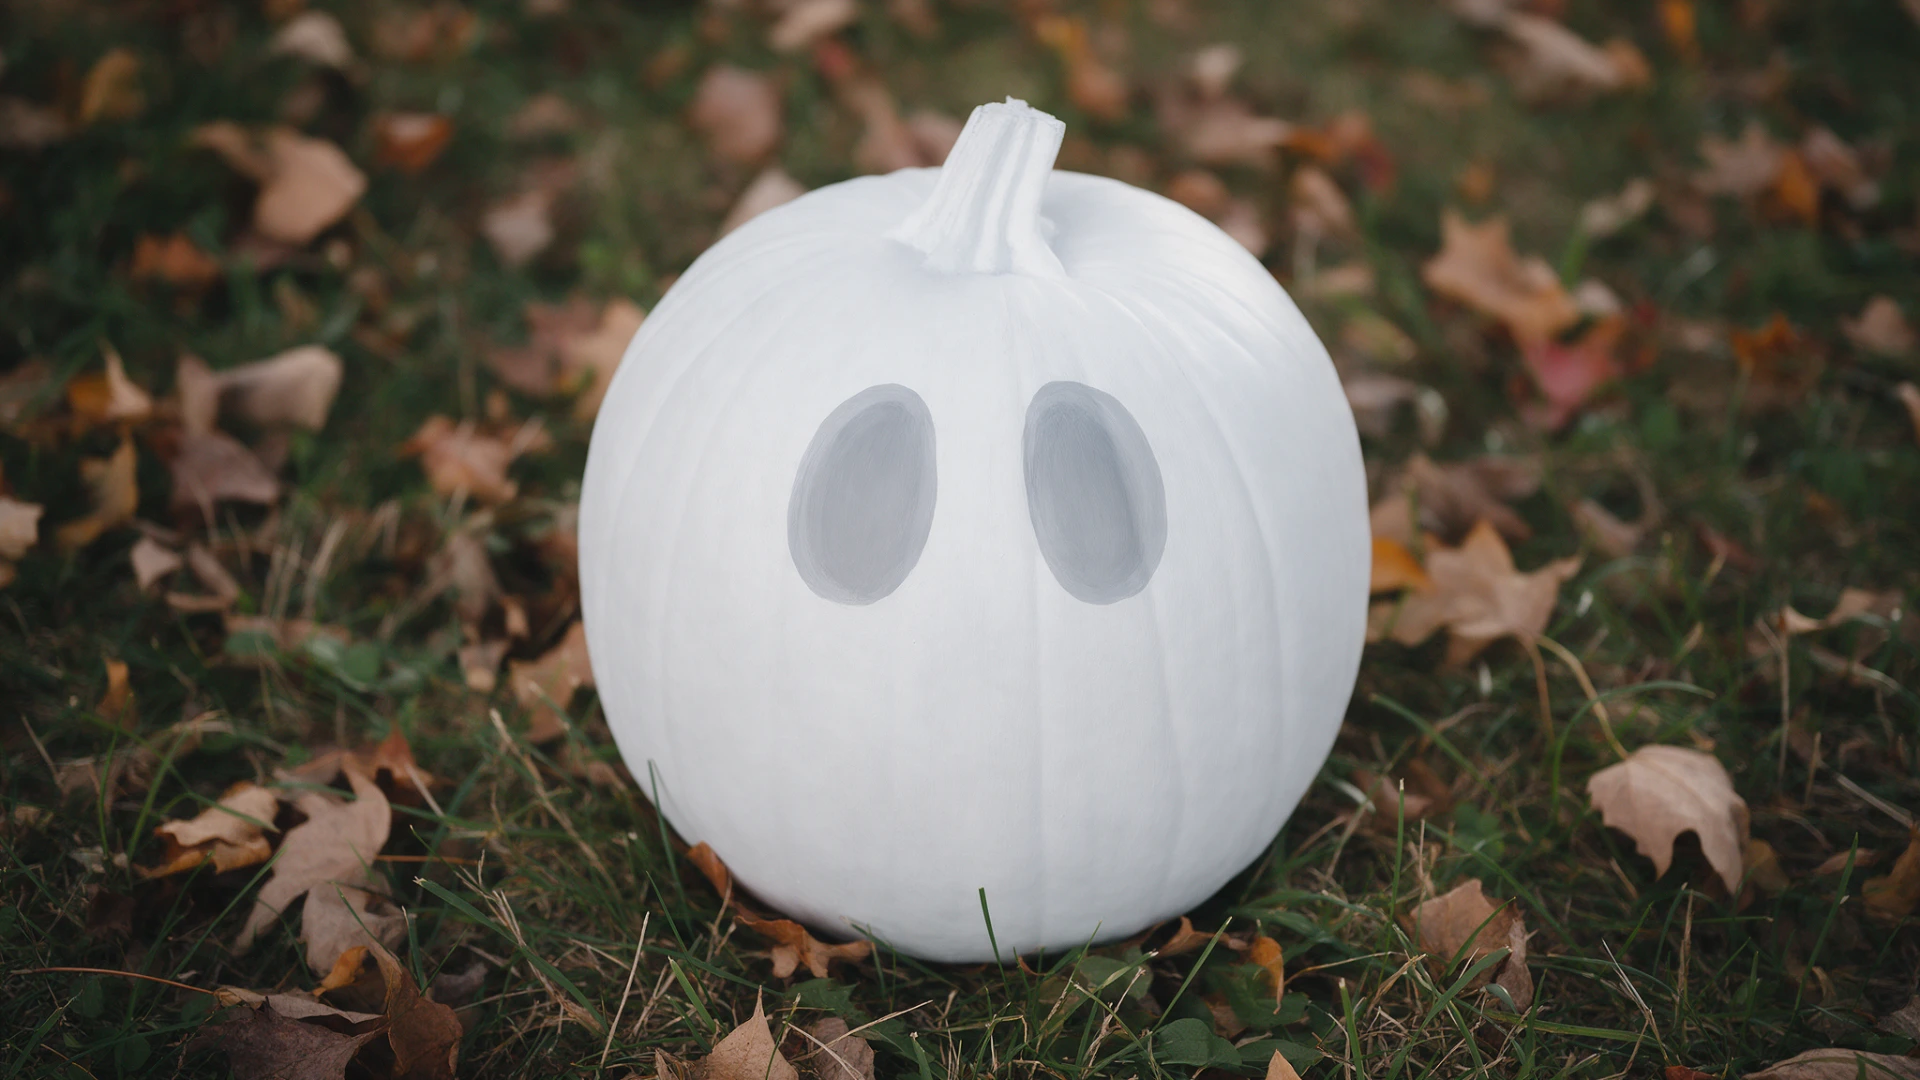
Cover the pumpkin completely in white paint, then add two simple gray or black eyes once it dries. Skip the mouth entirely, or keep it to a small oval, since a wide smile tends to push this design toward cartoonish instead of gentle.
This is the softest option on the whole list, which makes it a good pick for a porch where younger trick or treaters come through.
4. Spiderweb Pumpkin
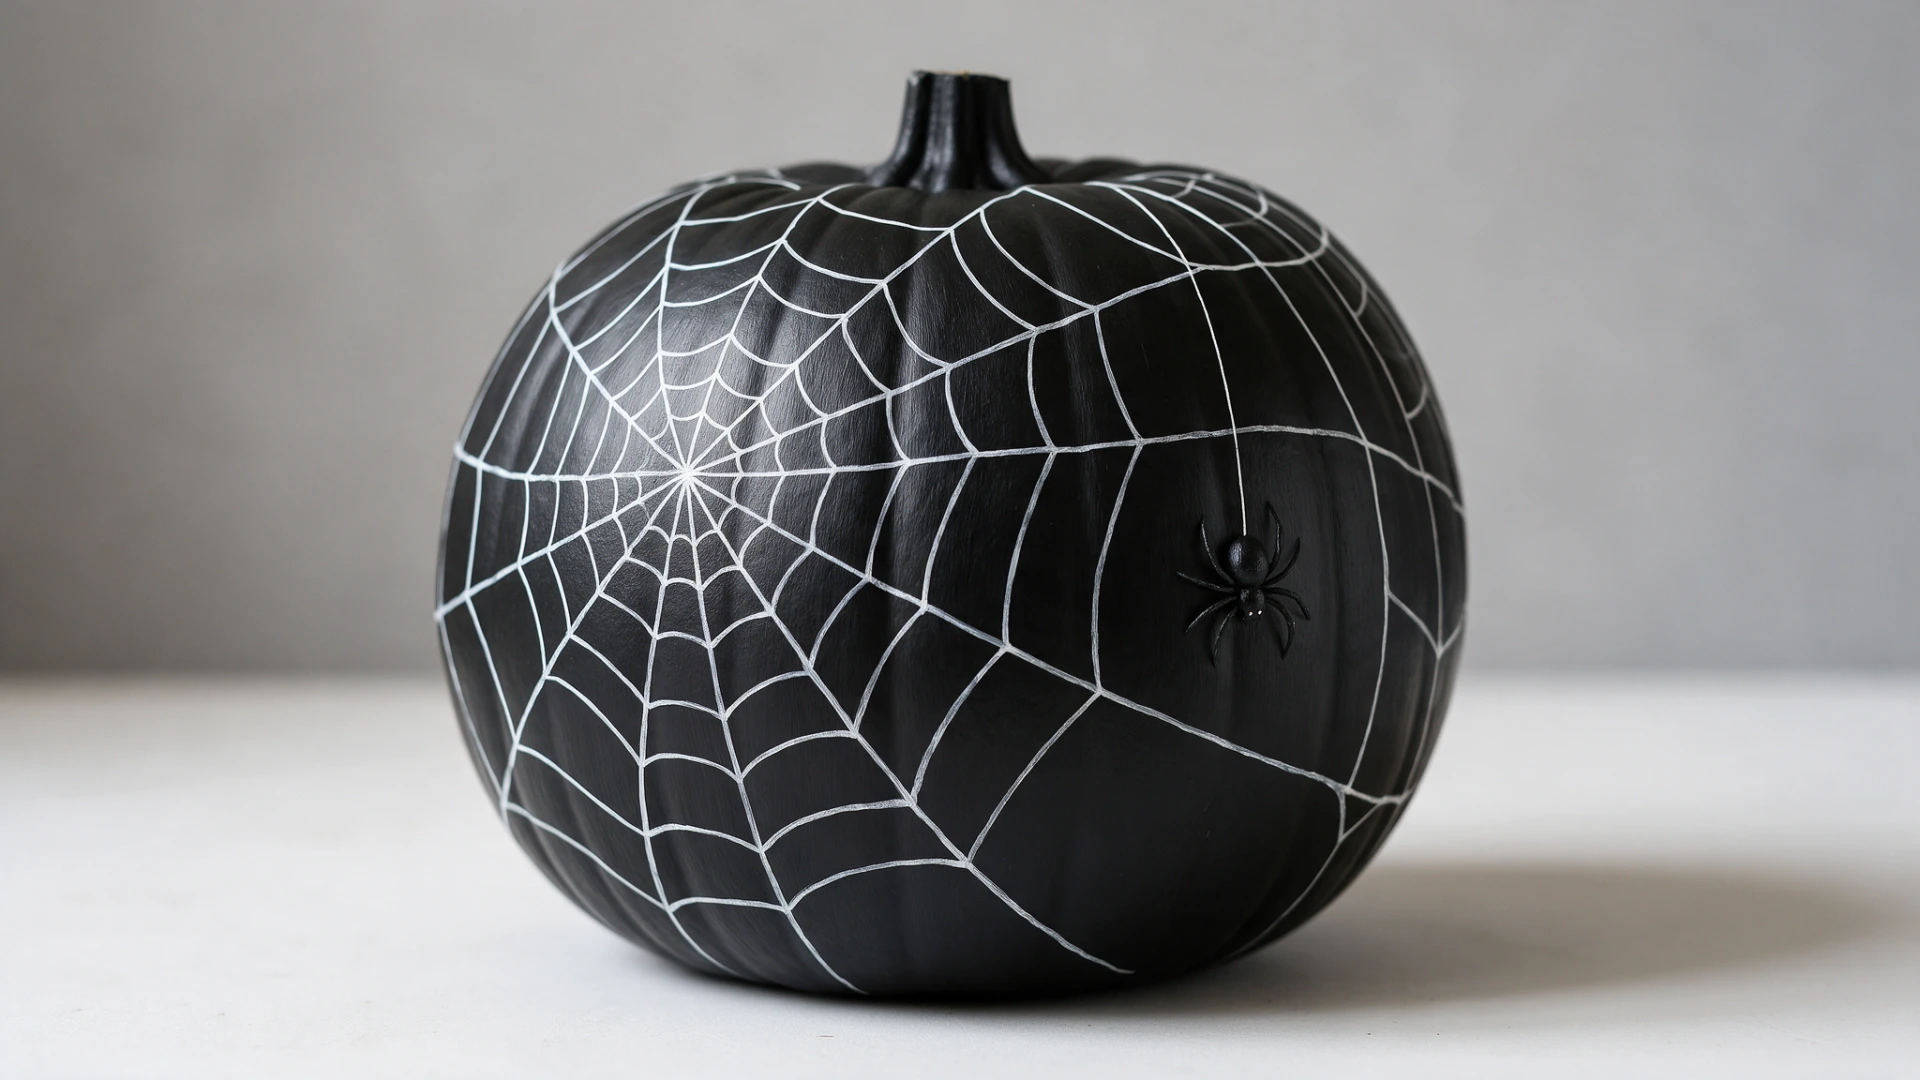
Start with a solid black or white base, then paint thin lines in the opposite color to build a web pattern across the surface. Keep the lines uneven and slightly wobbly on purpose.
Perfectly straight lines end up looking like a grid someone drew with a ruler, not a web an actual spider made. A few small dots along the lines can stand in for spiders if you want to add one more detail.
5. Bat Silhouette Pumpkin
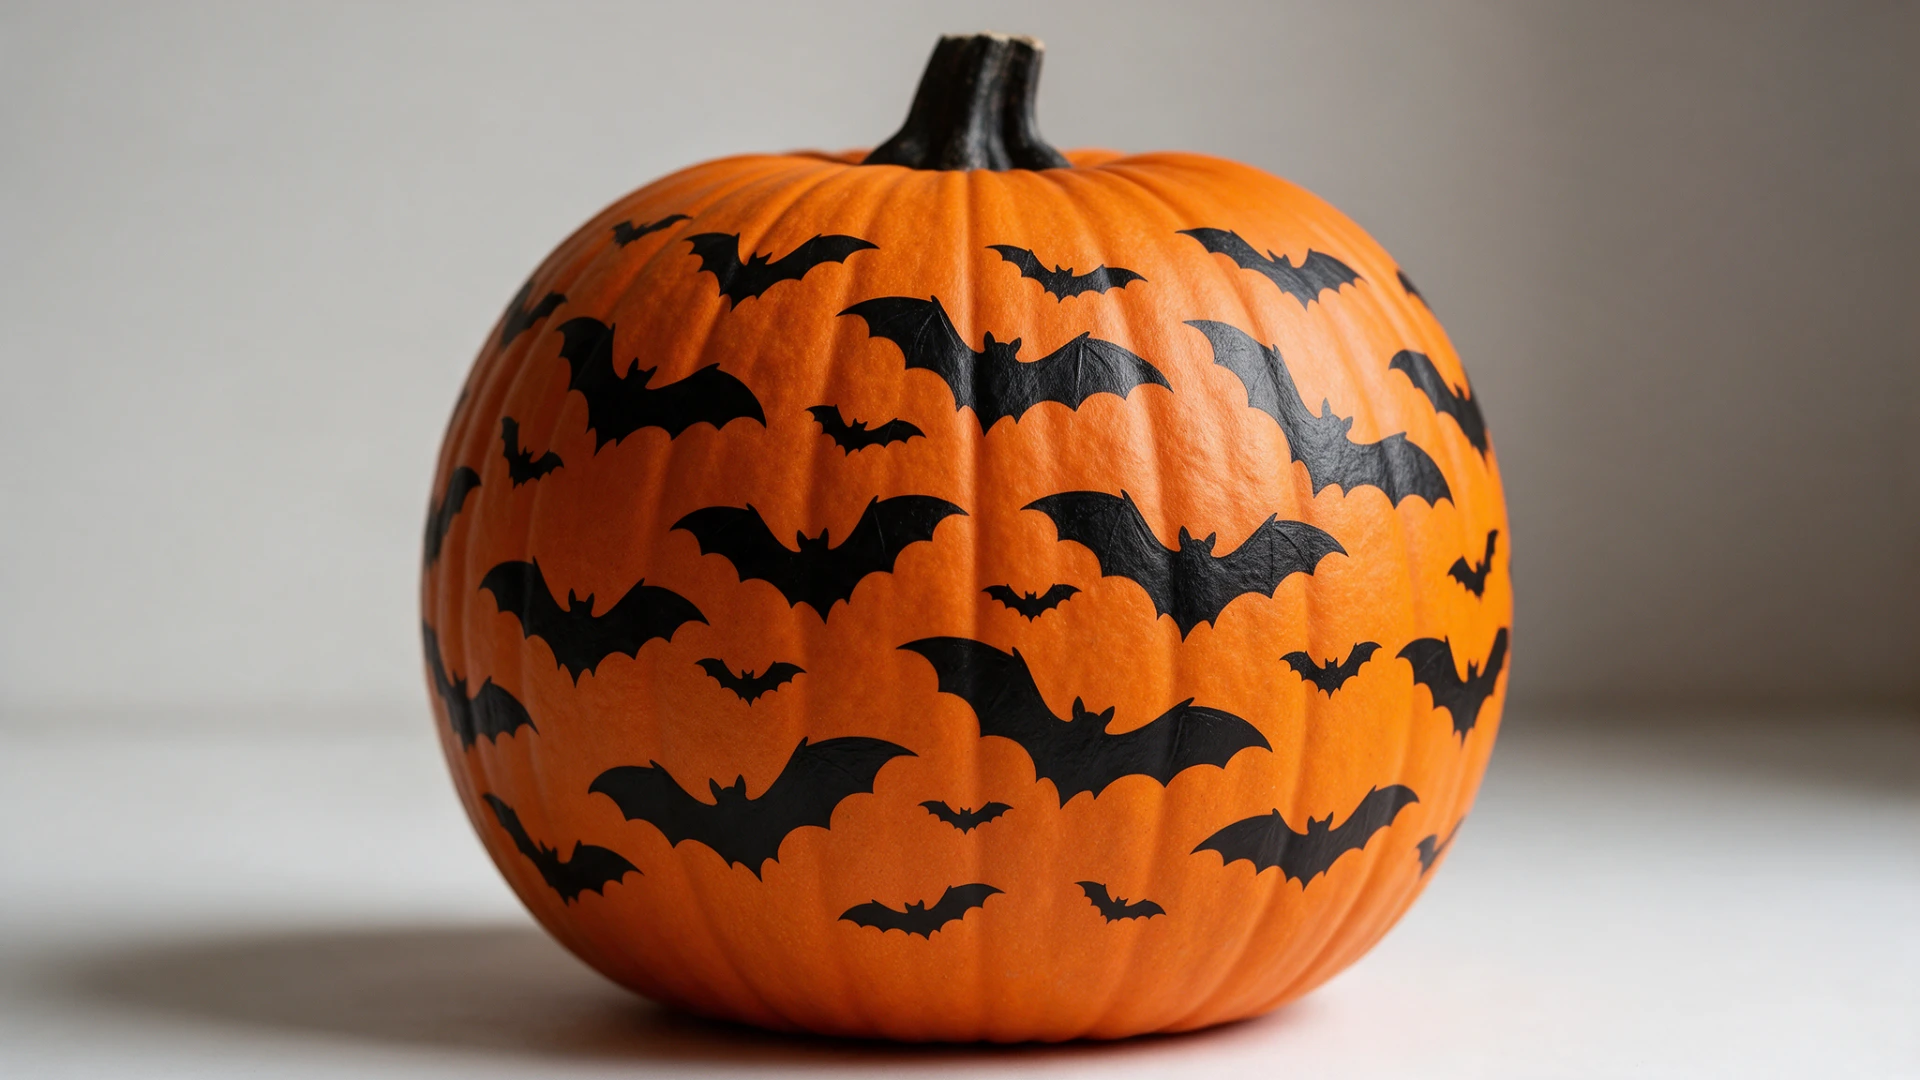
Paint a handful of small black bats scattered across an orange, white, or gray pumpkin rather than lining them up in a row. Vary the size and wing angle on each one so they look like they are actually moving through the air.
This design takes very little paint and even less time, which makes it a good option if you are painting several pumpkins at once for a party or a group display.
6. Skeleton Face Pumpkin
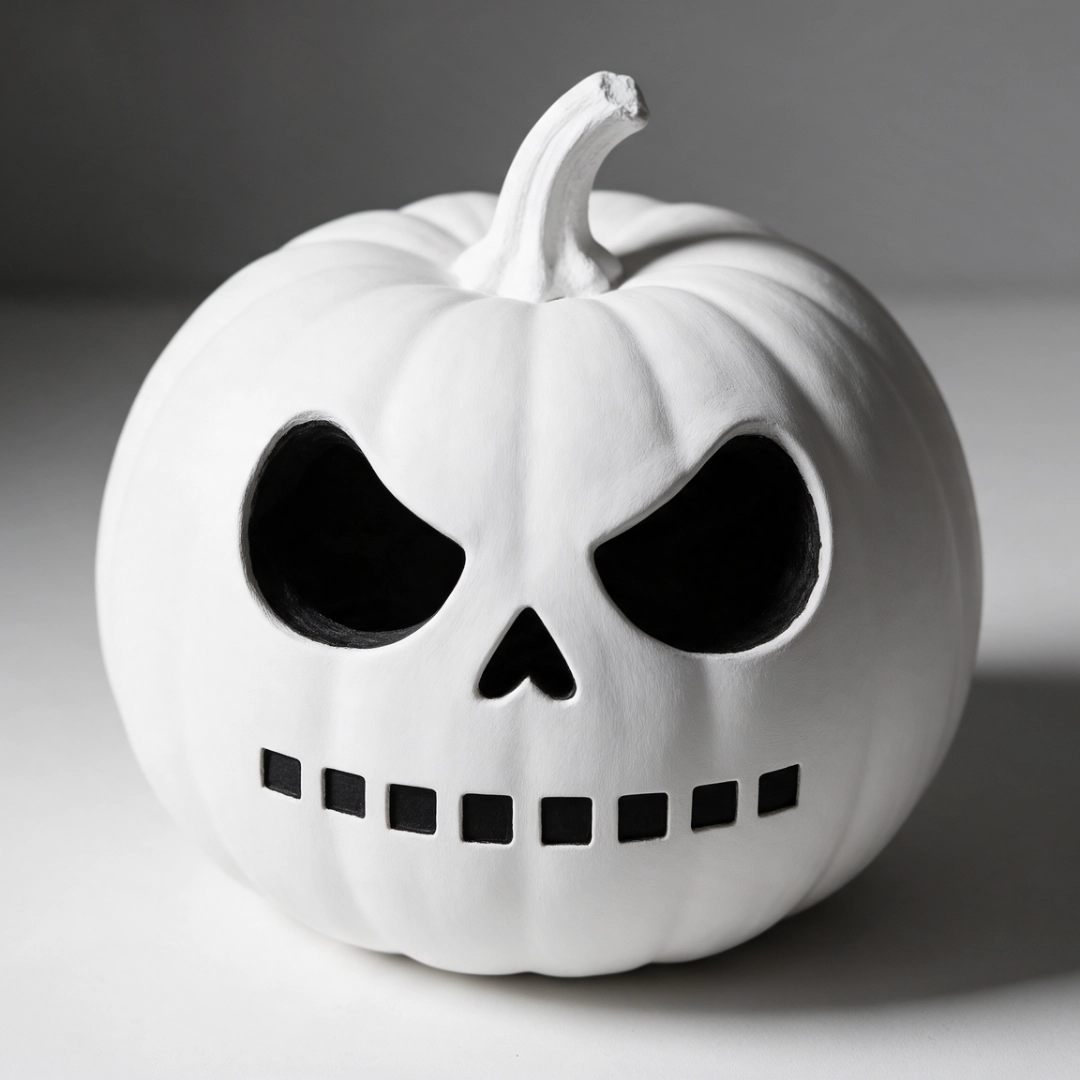
Start with a full white base coat, then paint dark, hollow looking eye sockets, a triangle for the nose, and a row of even teeth.
Skip the smile and paint a flat, straight line instead if you want the finished look to feel more unsettling than cartoonish.
This one takes a bit more patience than most designs here, since crooked or uneven teeth can throw off the whole face.
7. Witch Pumpkin
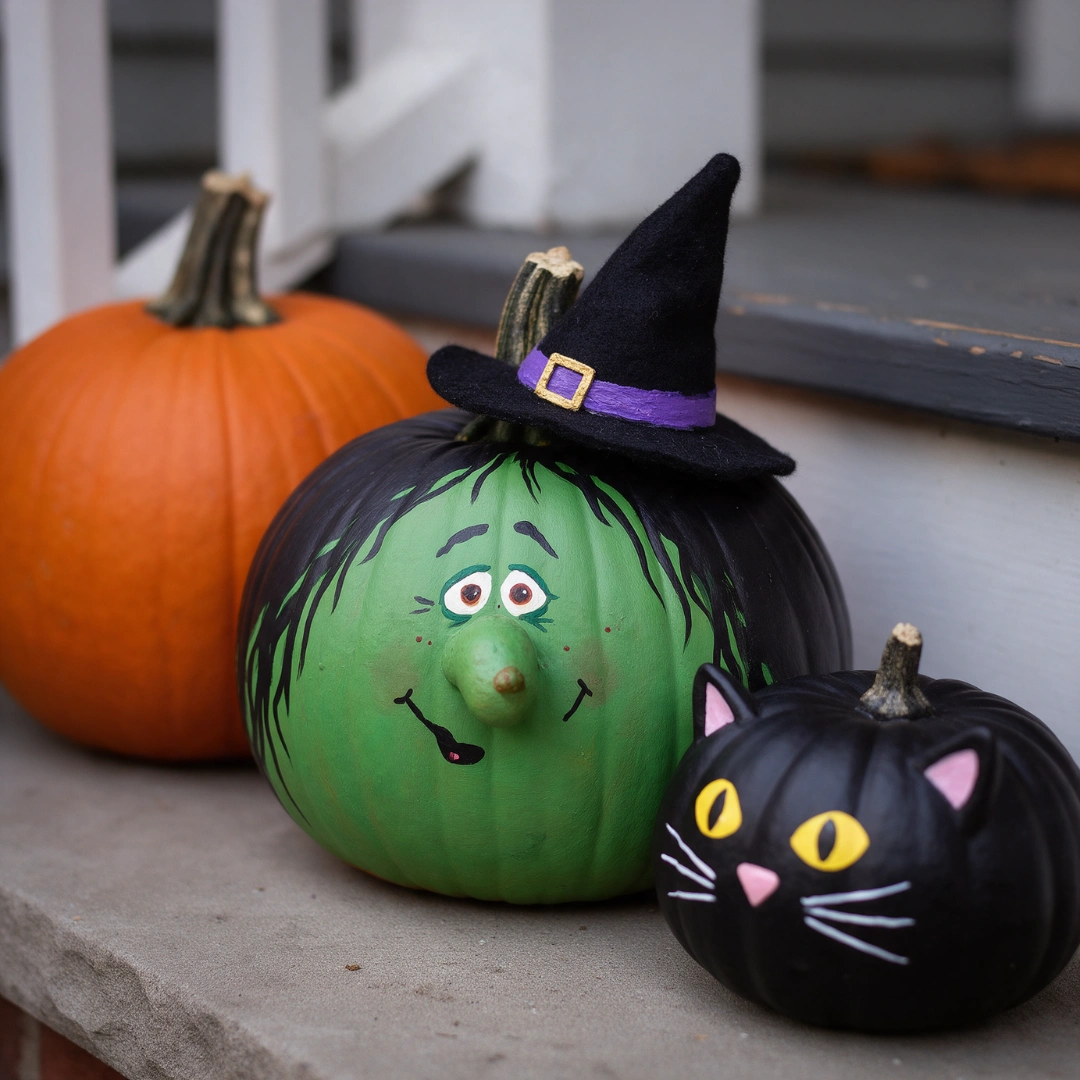
Paint a simple face first, keeping the features small and slightly off center. Then add a small witch hat shape near the stem, with a stripe or two and a tiny buckle painted near the base of the hat.
On its own this design can look a little plain, so it works best grouped next to a plain orange pumpkin and a black cat pumpkin on the front steps.
8. Monster Face Pumpkin
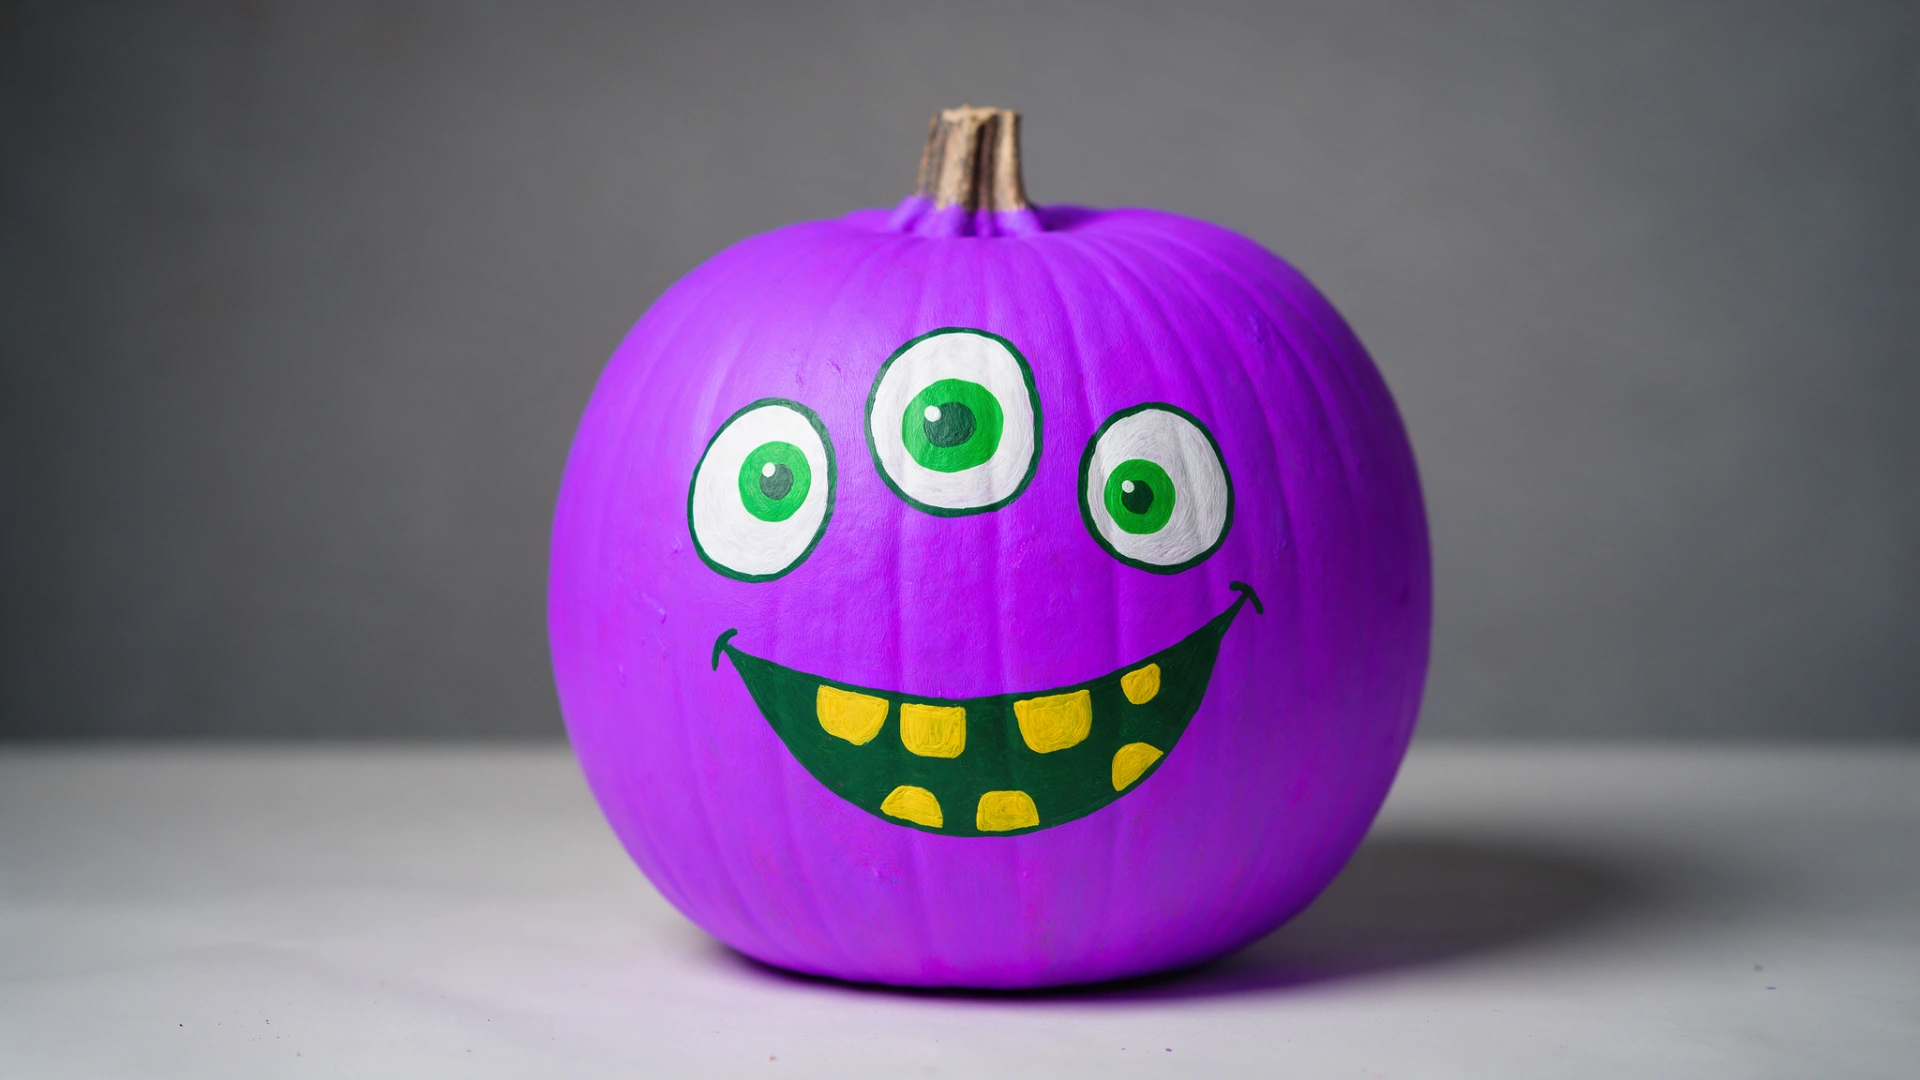
Reach for a bright color like green or purple for the base coat instead of the usual orange, since that alone makes this design stand out.
Paint big, uneven eyes set at different heights, then add a row of crooked teeth in a wide open mouth.
Kids tend to enjoy this one more than any other design here, mostly because there is no wrong way to make a monster look strange.
9. Mummy Pumpkin
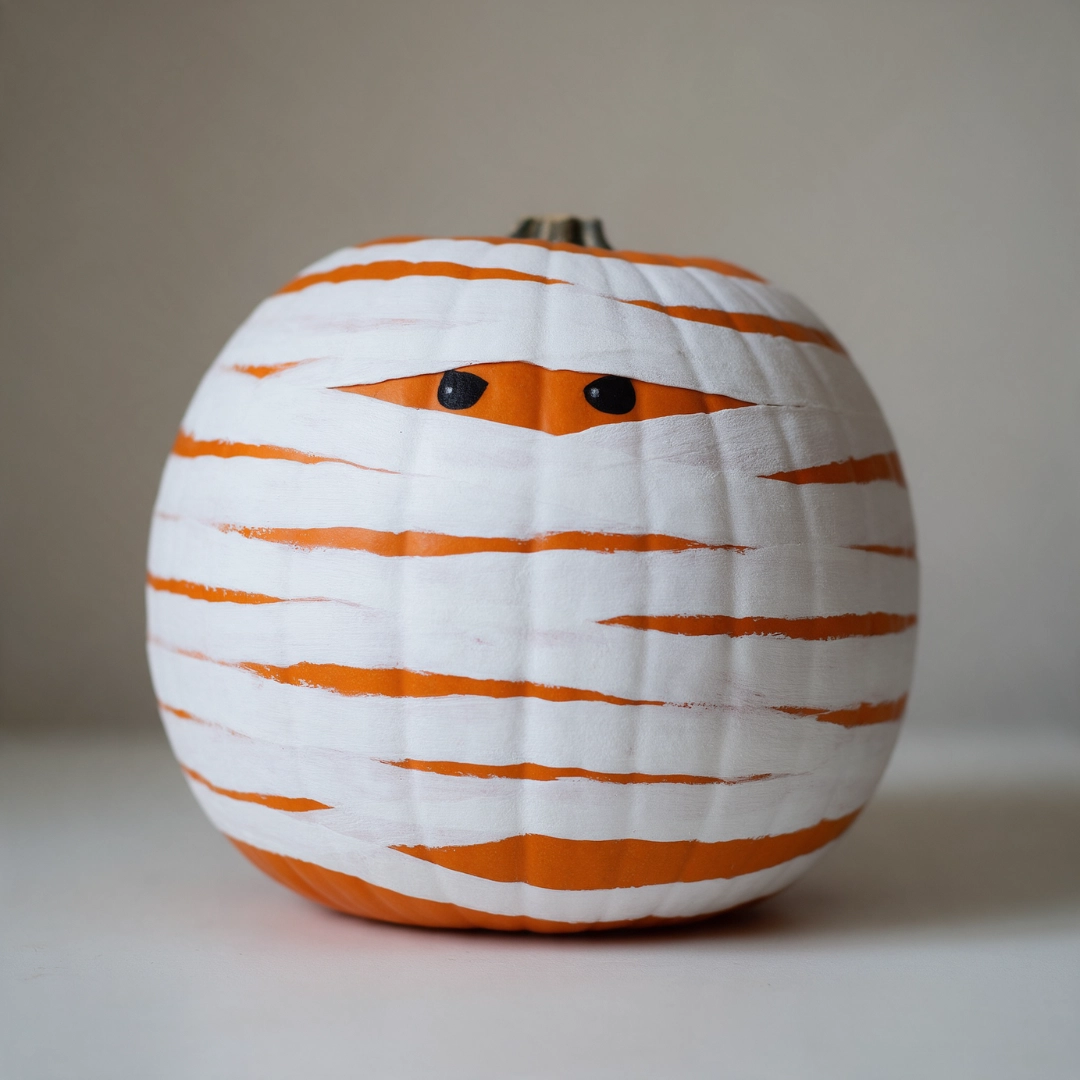
Paint wide white bands wrapped around the pumpkin like loose bandages, leaving two small gaps somewhere in the middle for a pair of eyes to peek through.
Let the edges of each band stay a little rough and uneven rather than painting them clean. Straight, tidy lines actually work against this design, since they end up looking more like stripes than bandages that were wrapped by hand.
10. Candy Corn Pumpkin
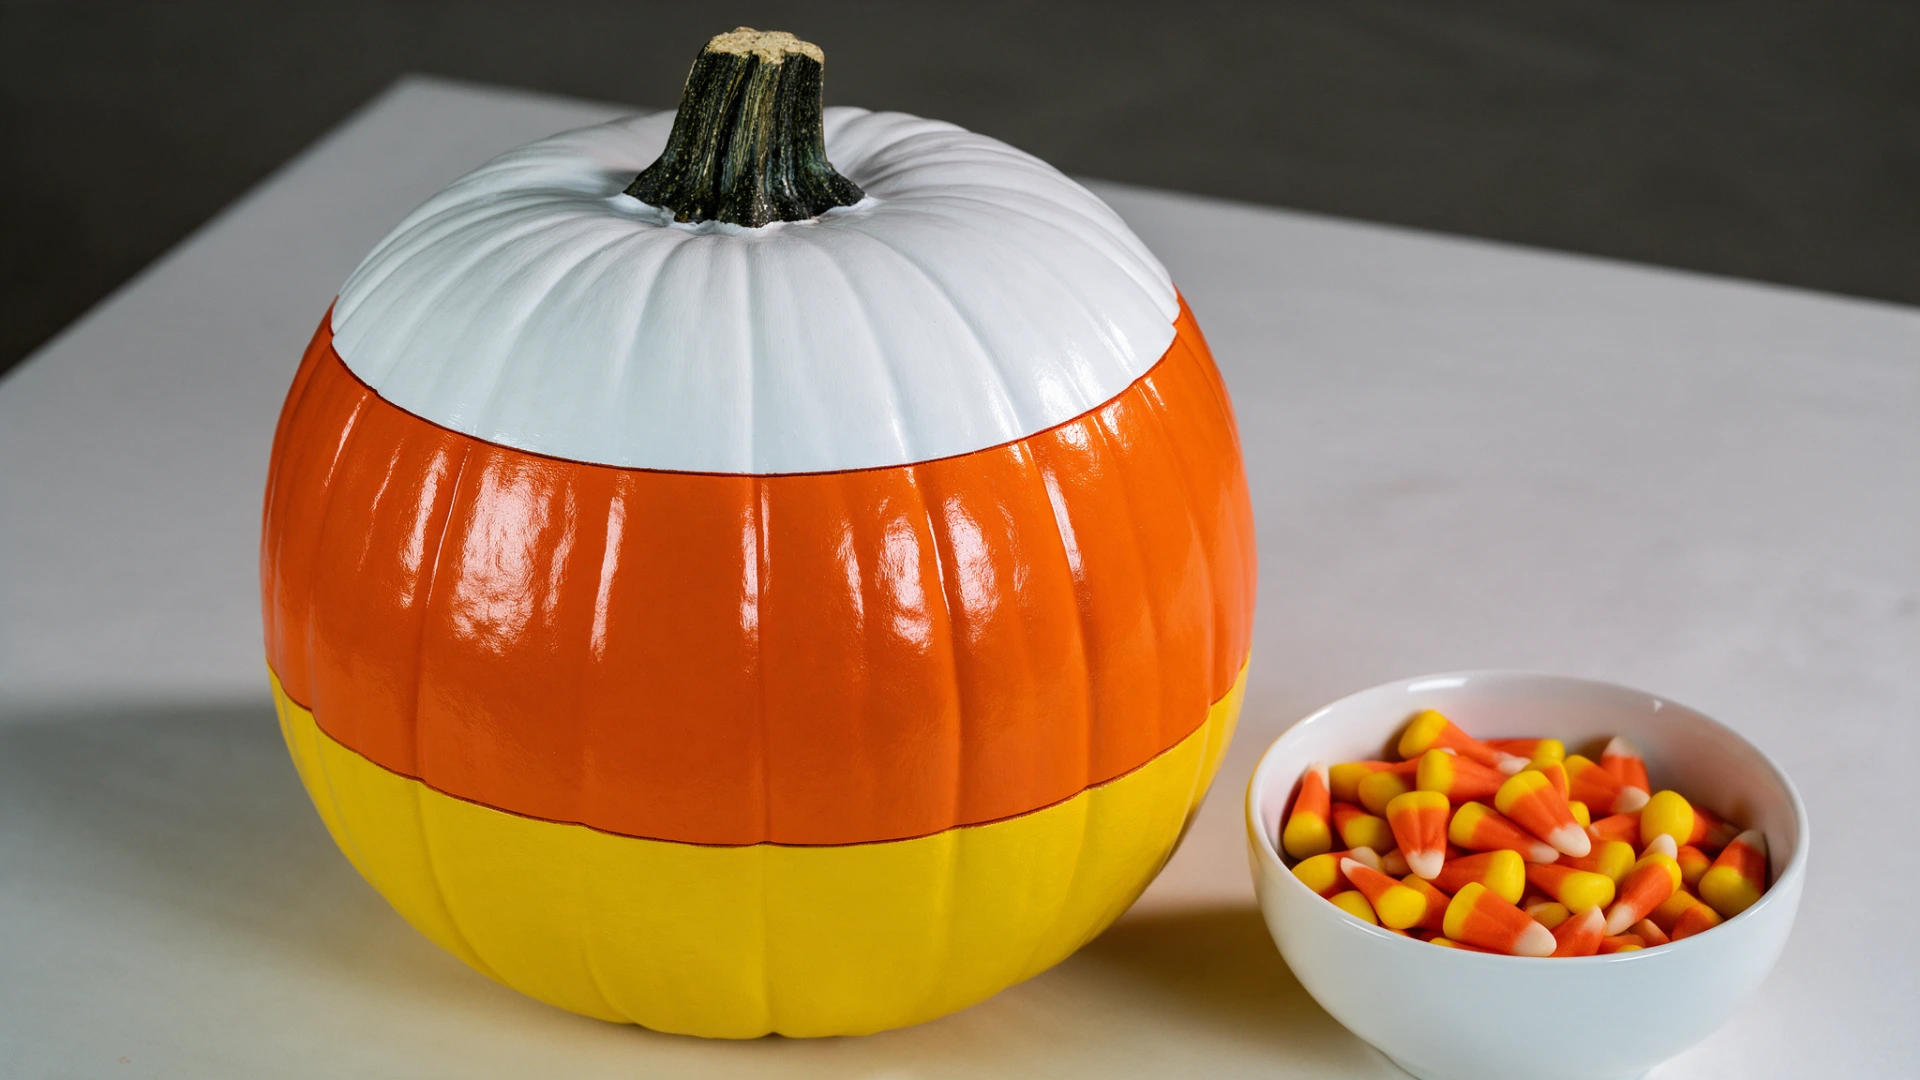
Divide the pumpkin into three horizontal sections and paint them like the candy itself: yellow near the bottom, orange through the middle, and white at the top near the stem.
This one gets noticed fast at a Halloween party, mostly because people expect an orange or black pumpkin and this looks nothing like either.
Keep the section lines fairly even, since this is one design where a neat finish actually helps.
11. Dripping Paint Pumpkin
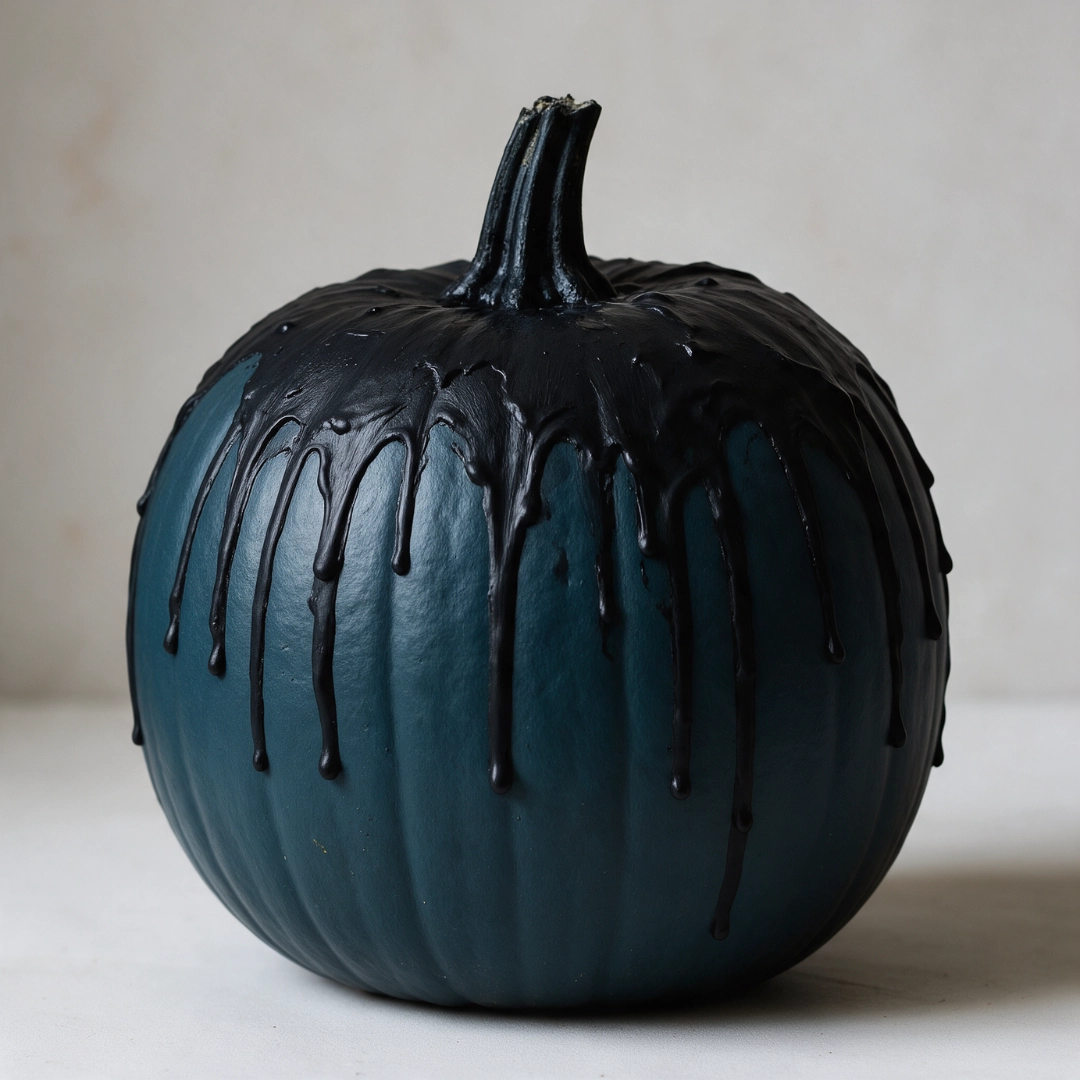
Paint the pumpkin a solid base color first, then use a second color to add thin lines running down from the top like they are dripping or melting.
Vary the length of each drip instead of stopping them all at the same point. Lines of the exact same length end up looking planned and neat, while uneven ones give the whole design a more convincing, spooky effect.
12. Polka Dot Pumpkin
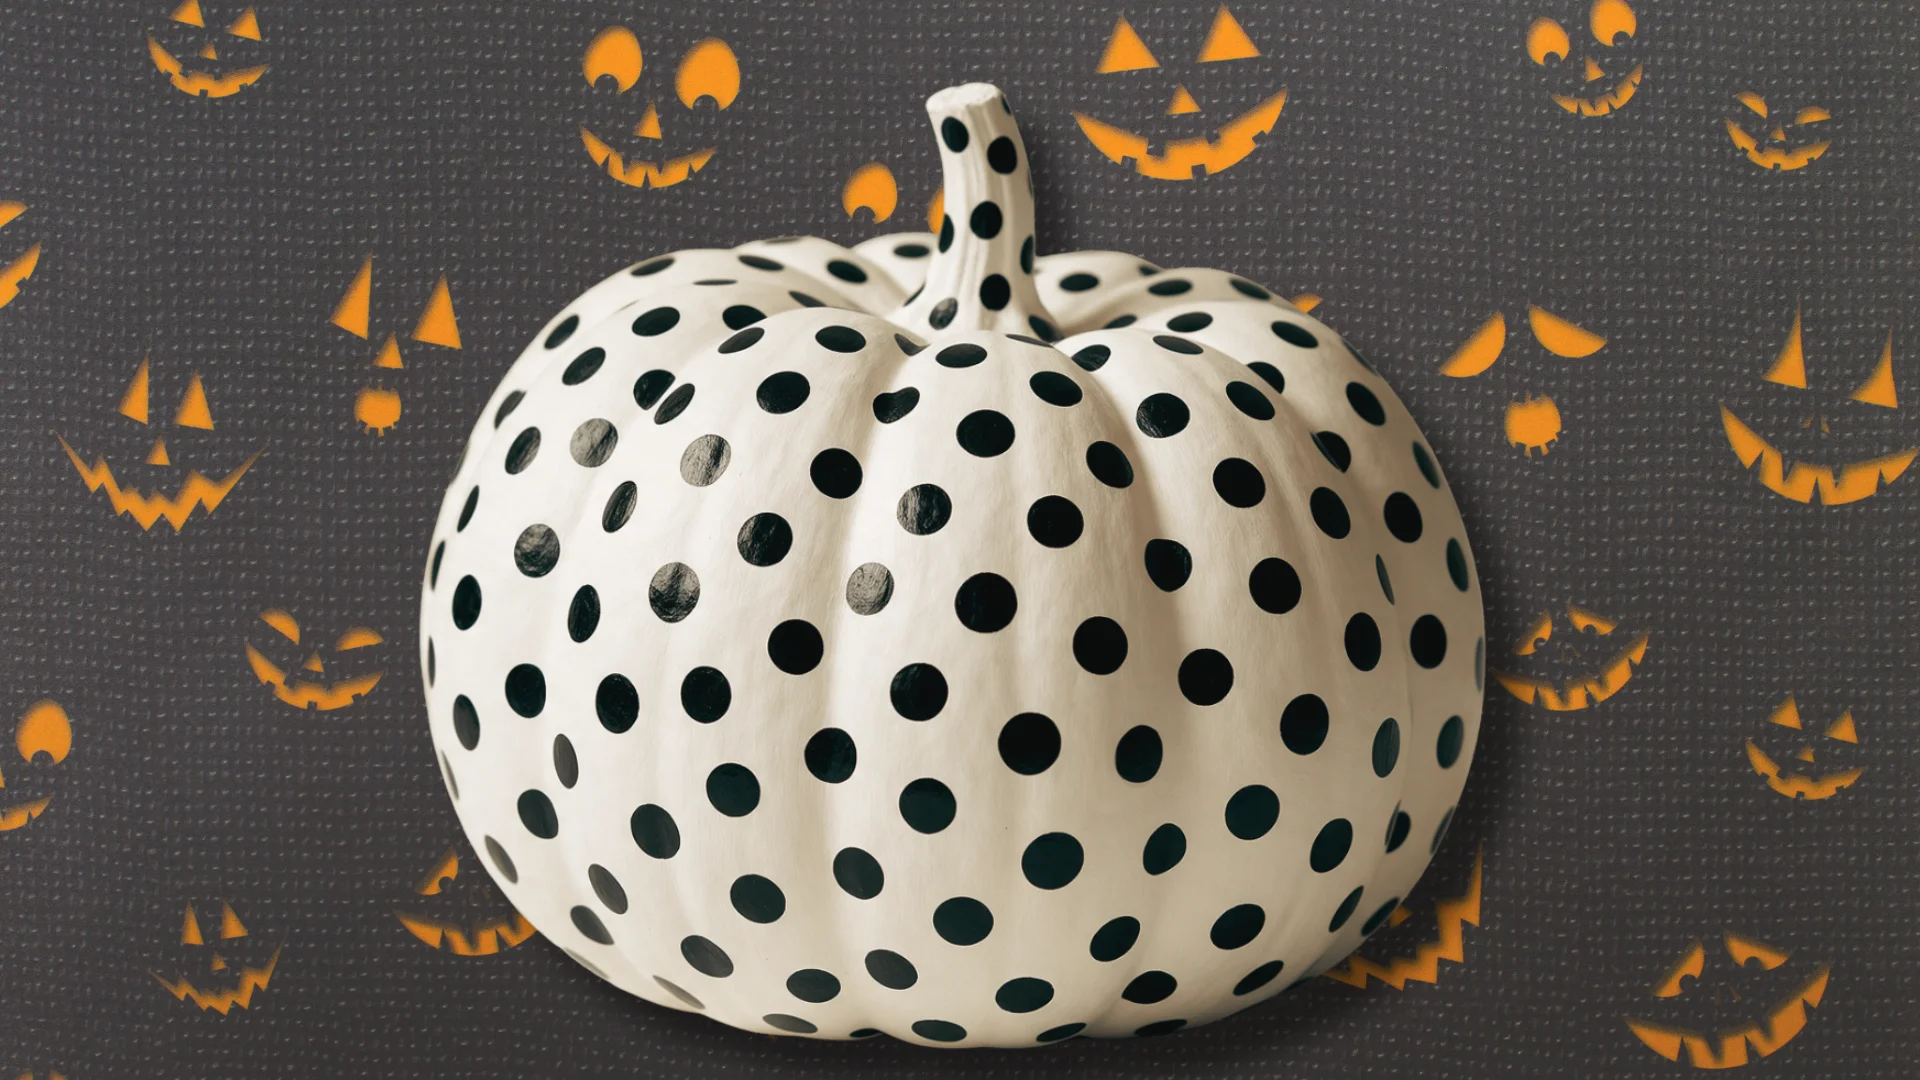
Dip the end of a pencil, a cotton swab, or a small dowel into paint and stamp even dots across the pumpkin in black, white, orange, or metallic paint.
This is one of the fastest designs on this entire list, which makes it a good option for a large group of pumpkins you want to paint the same way without spending an entire afternoon on each one.
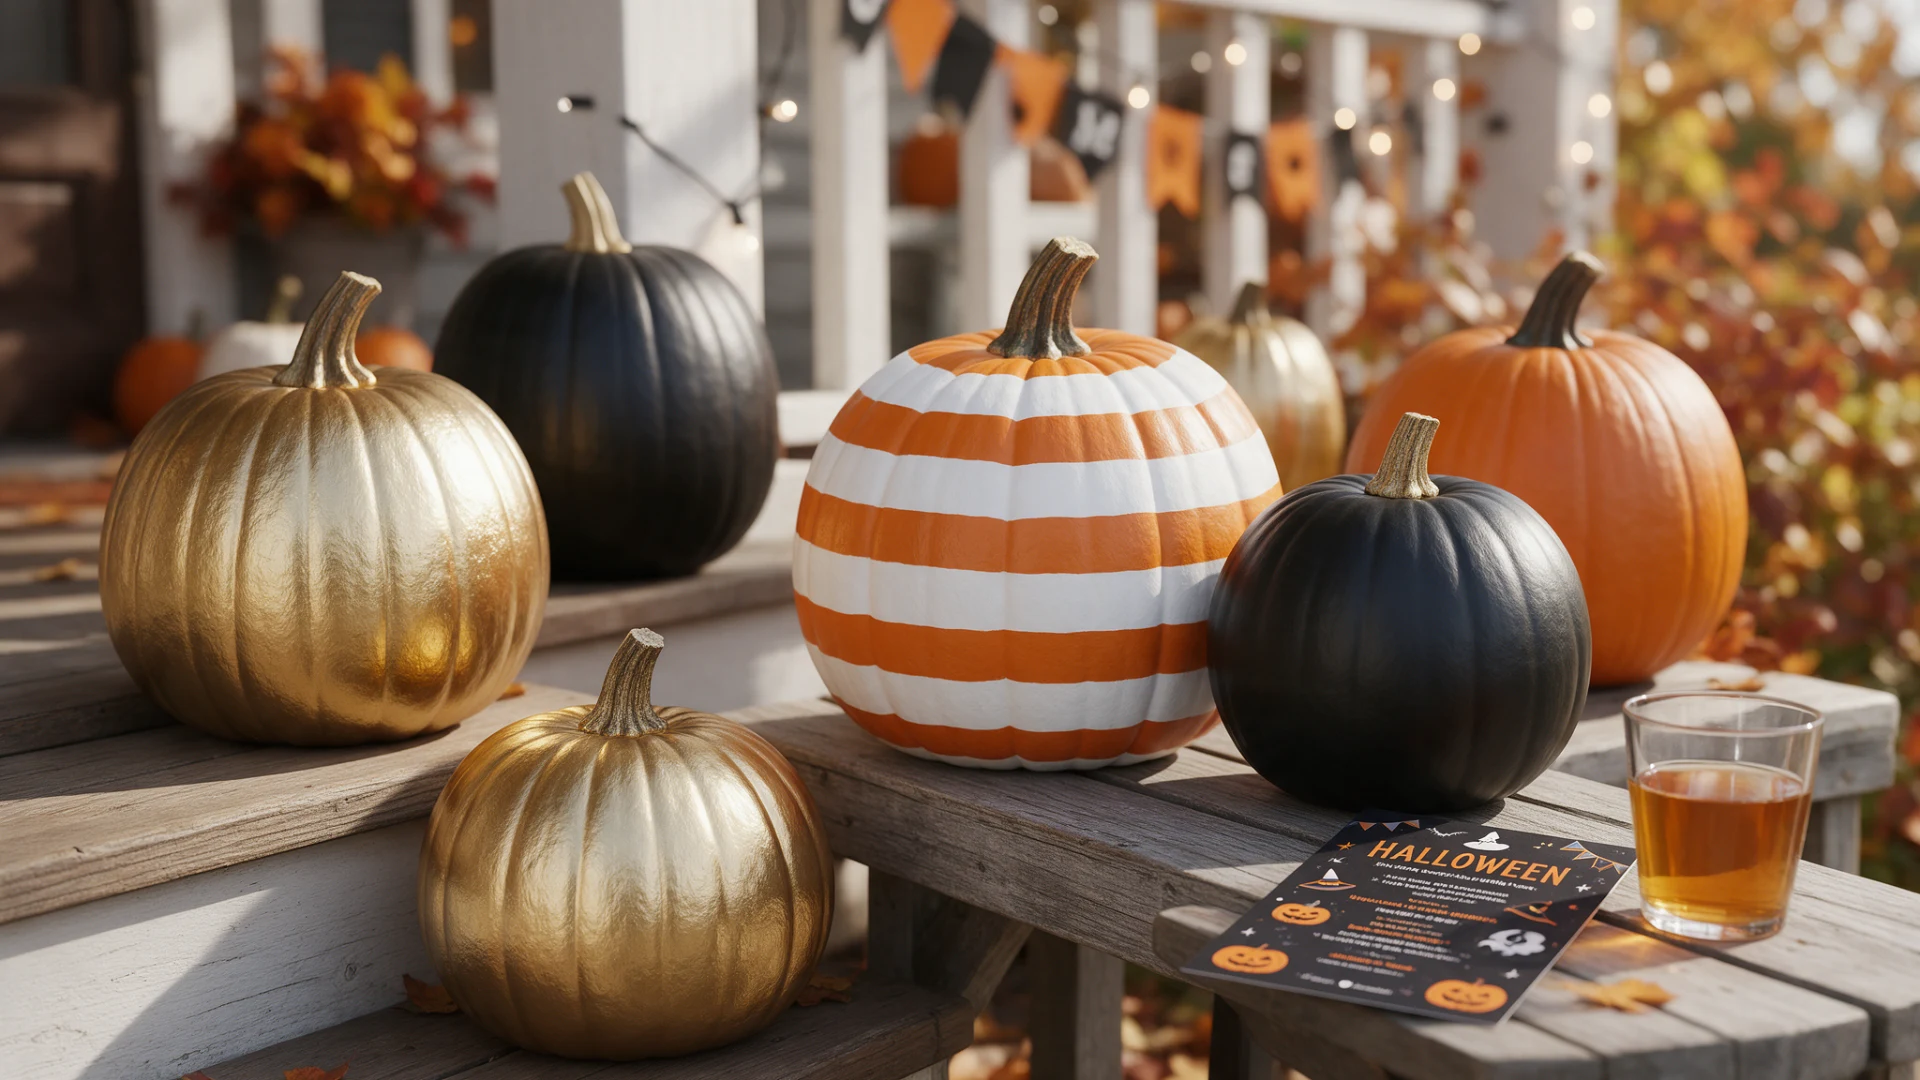
13. Striped Halloween Pumpkin
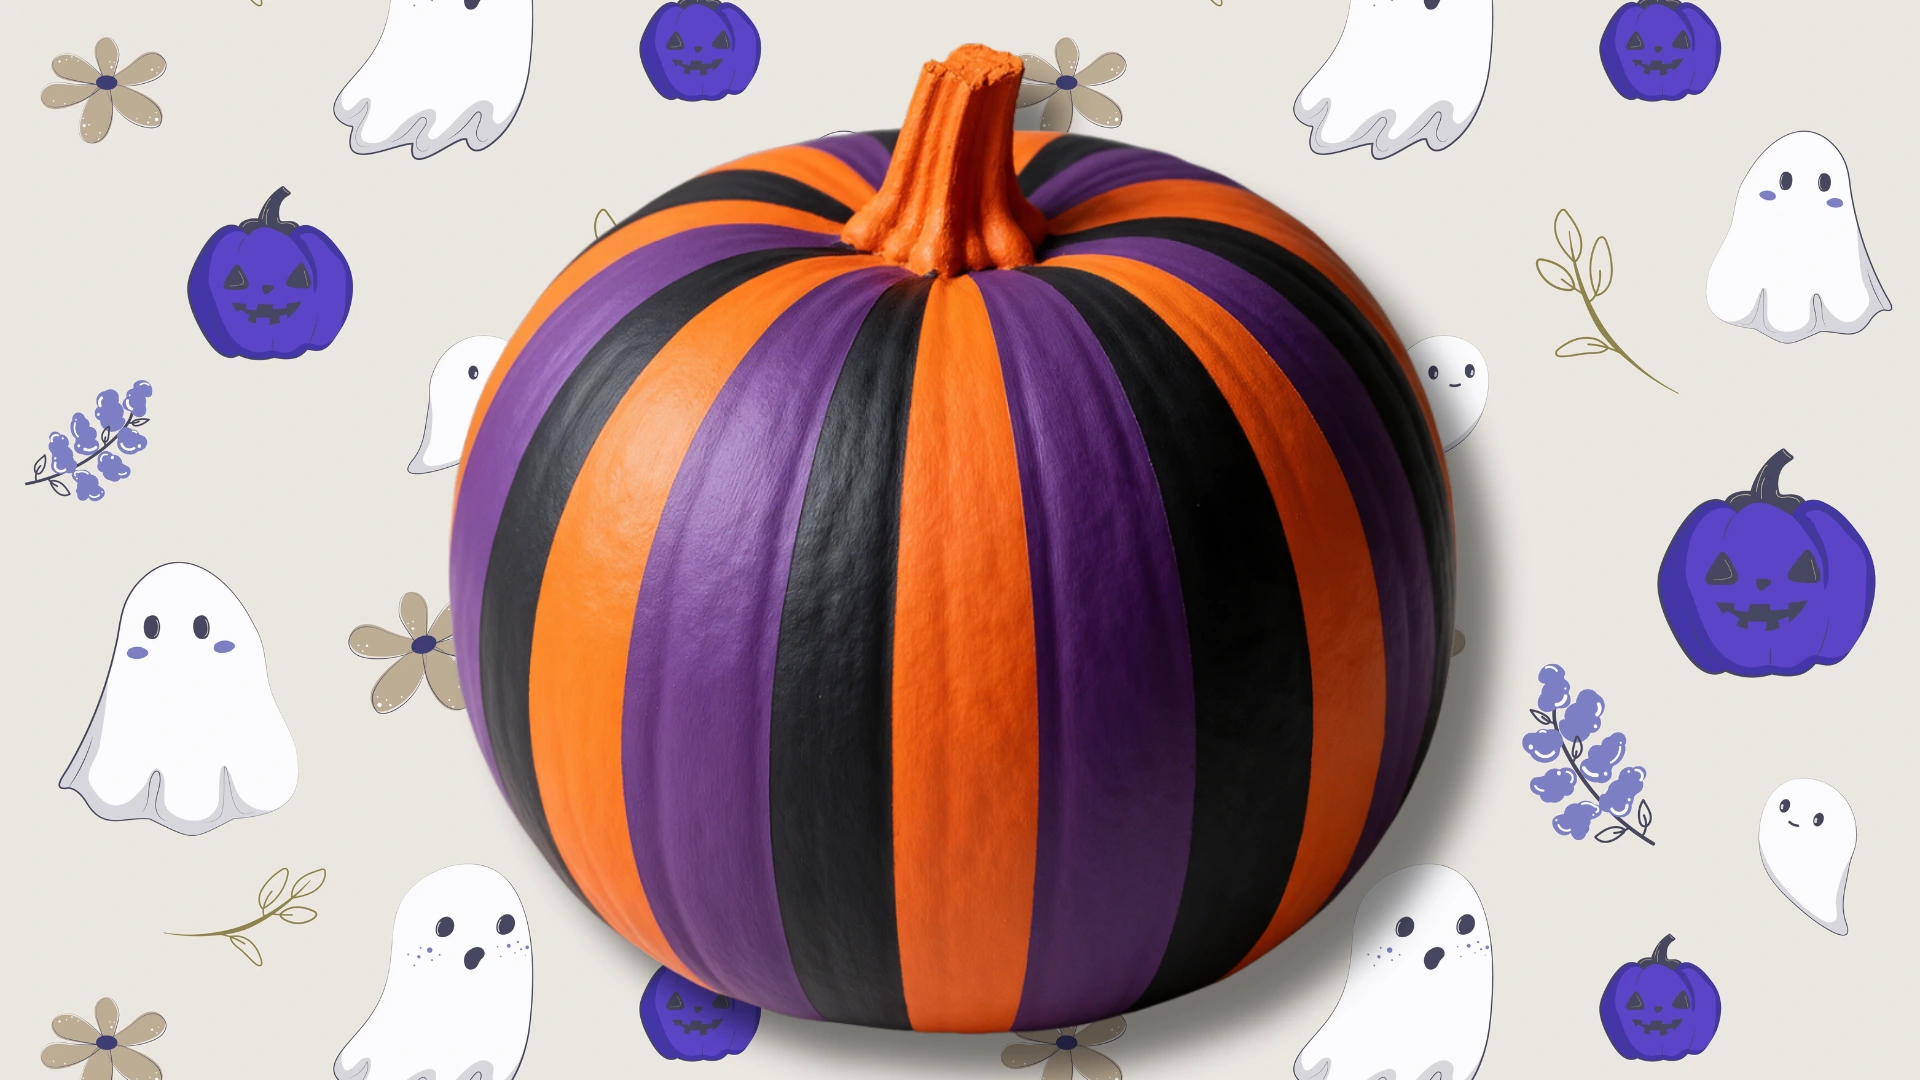
Use painter’s tape to section off vertical or horizontal stripes, then fill each section with a different Halloween color like black, orange, or purple. Peel the tape away while the paint underneath is still slightly tacky rather than fully dry.
Waiting too long is a common mistake here, since fully dried paint tends to pull away and chip when the tape finally comes off.
14. Metallic Halloween Pumpkin
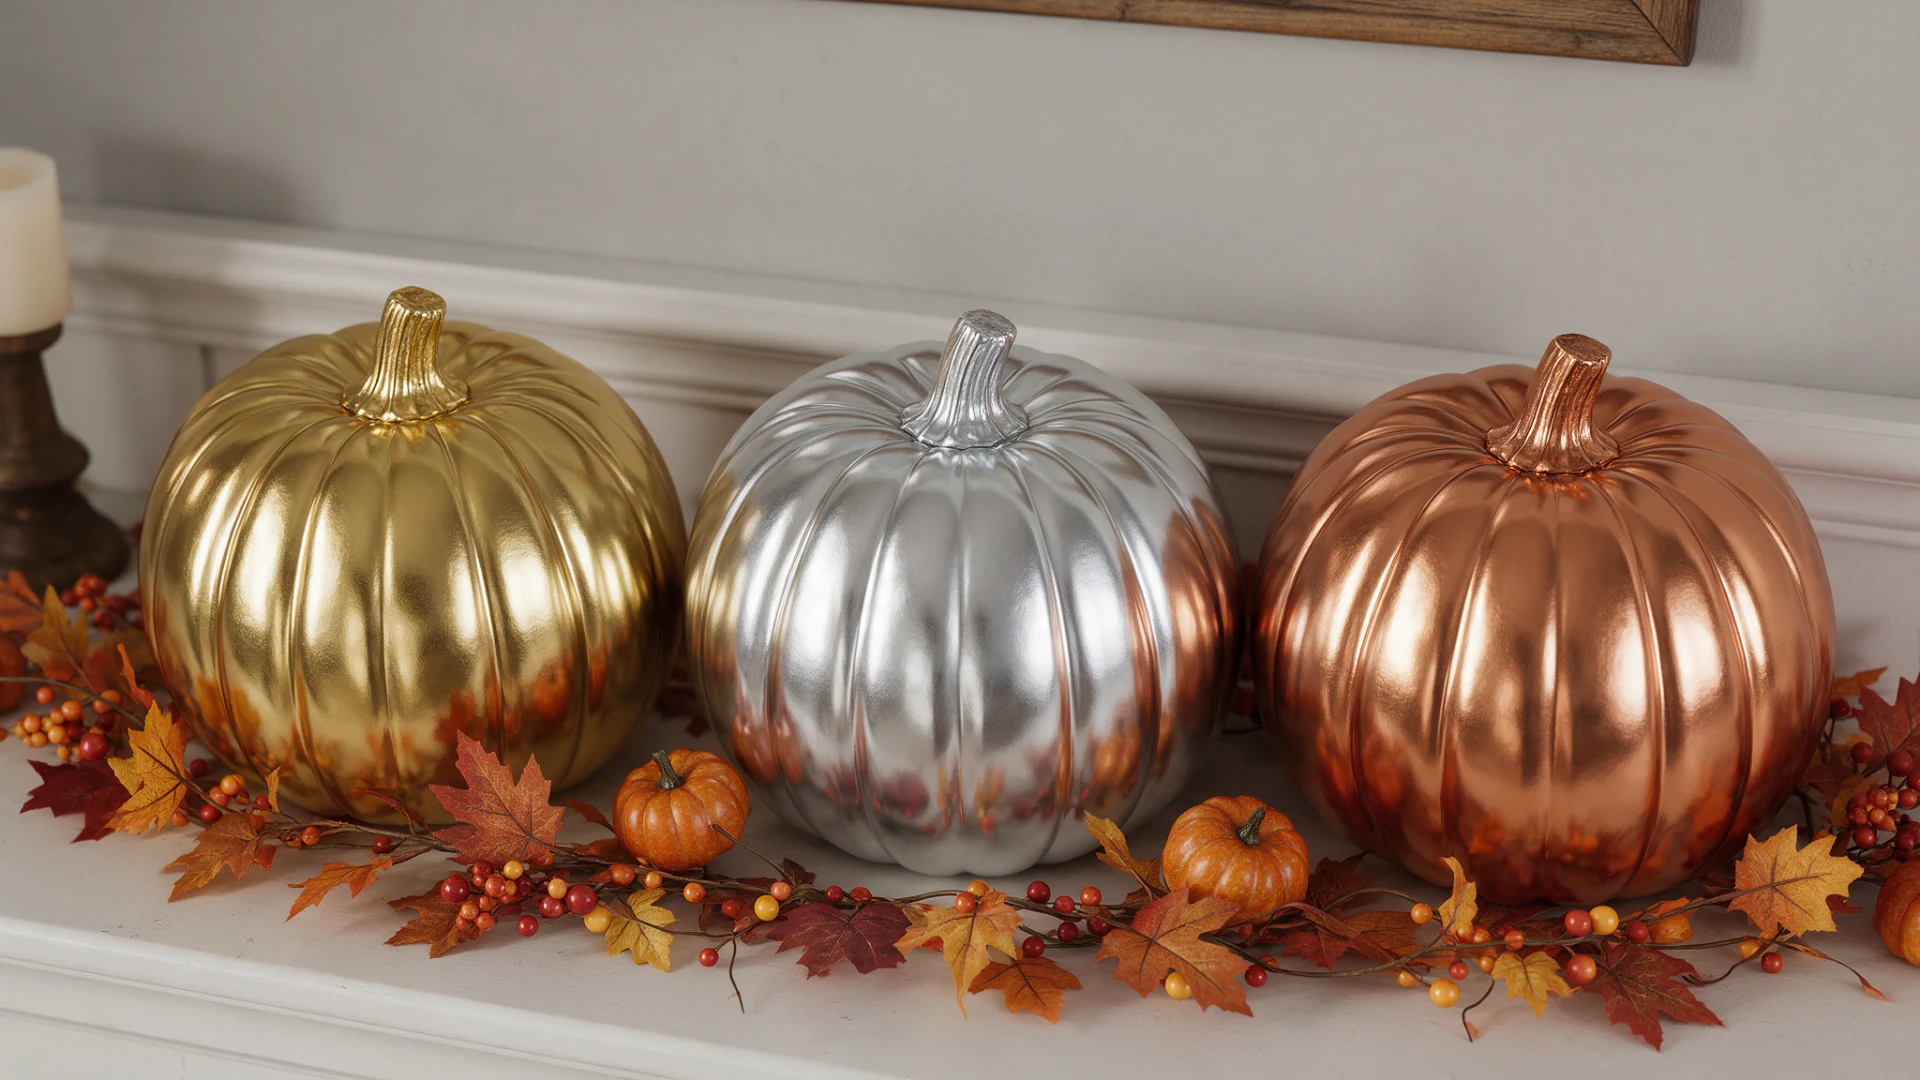
Paint the entire pumpkin gold, silver, or copper for a look that suits a dining table or mantel far more than it suits a porch step in the rain.
Metallic paint tends to show brush strokes more clearly than regular acrylic does, so a light spray coat gives a cleaner, more even result if you happen to have one on hand before you start.
15. Glow in the Dark Pumpkin
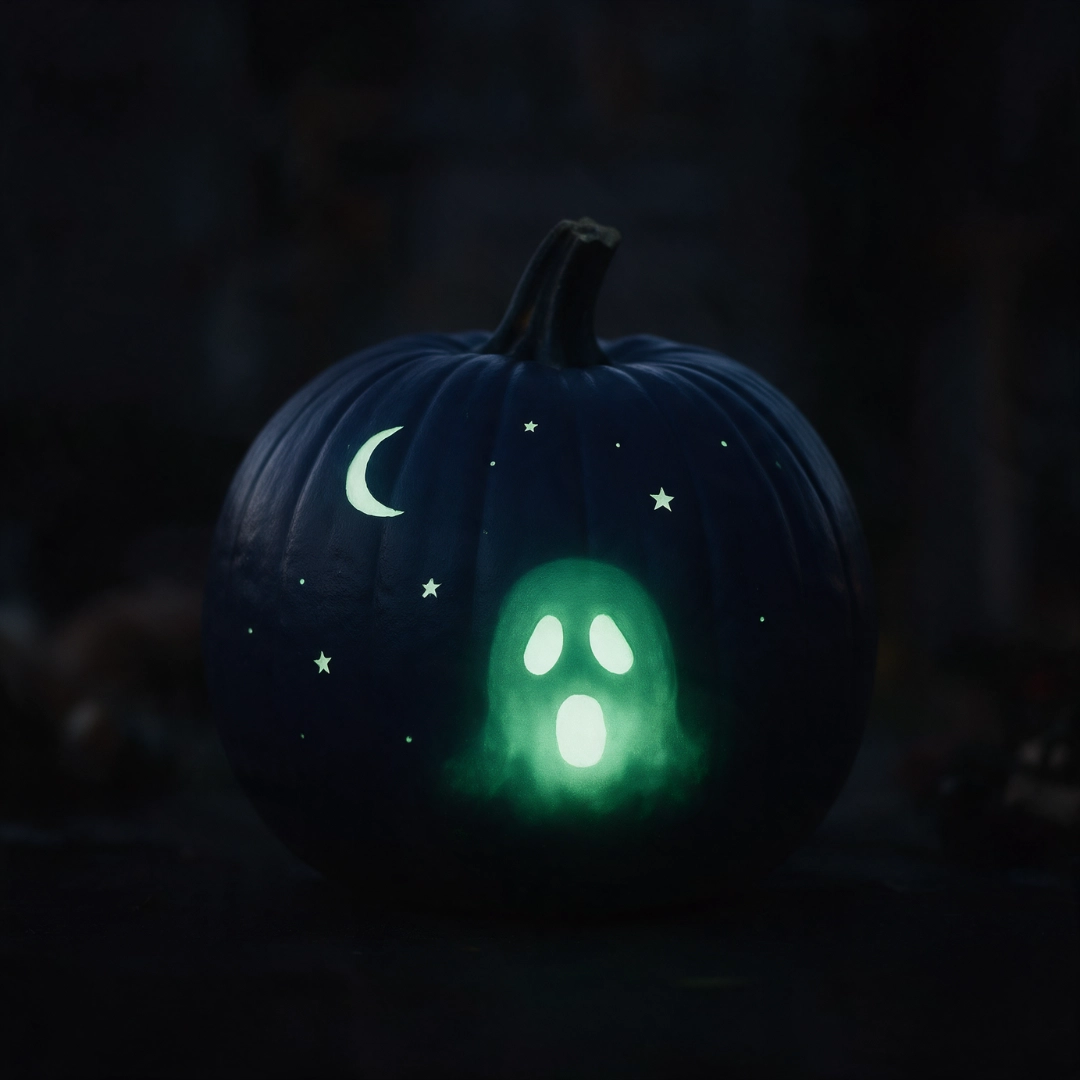
Most of these paints need several minutes under a direct light source to charge before they will actually glow once it gets dark.
Keep that timing in mind if you are painting one right before guests arrive, since a pumpkin painted at the last minute may barely glow at all.
16. Haunted House Pumpkin
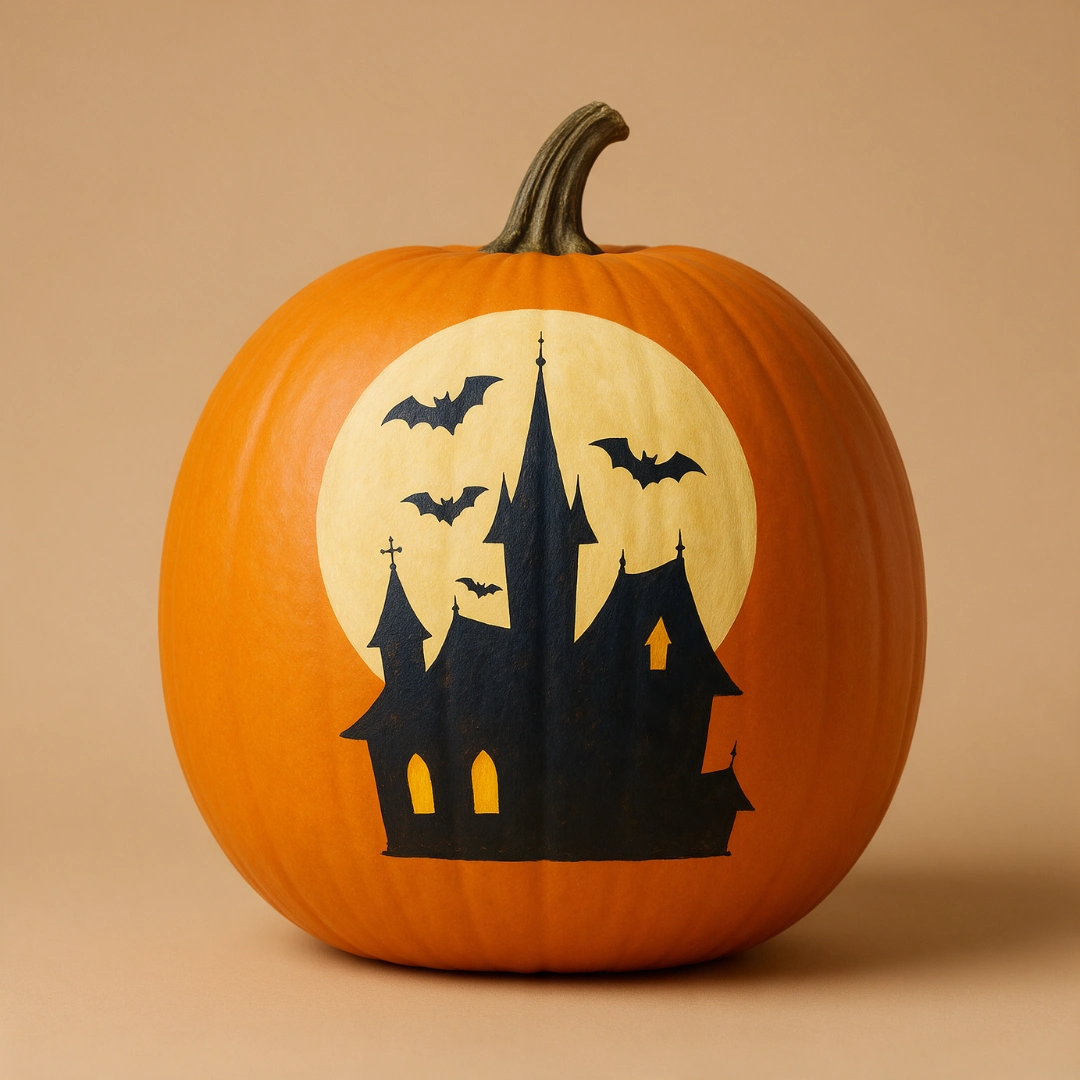
Paint a dark house shape across the pumpkin, then add a few small square windows, a bat or two nearby, and a plain circle for the moon behind it.
Leaving some windows unlit, or painting one a slightly different shade than the rest, adds more depth to the design than filling the entire house in one flat color would.
17. Eyeball Pumpkin
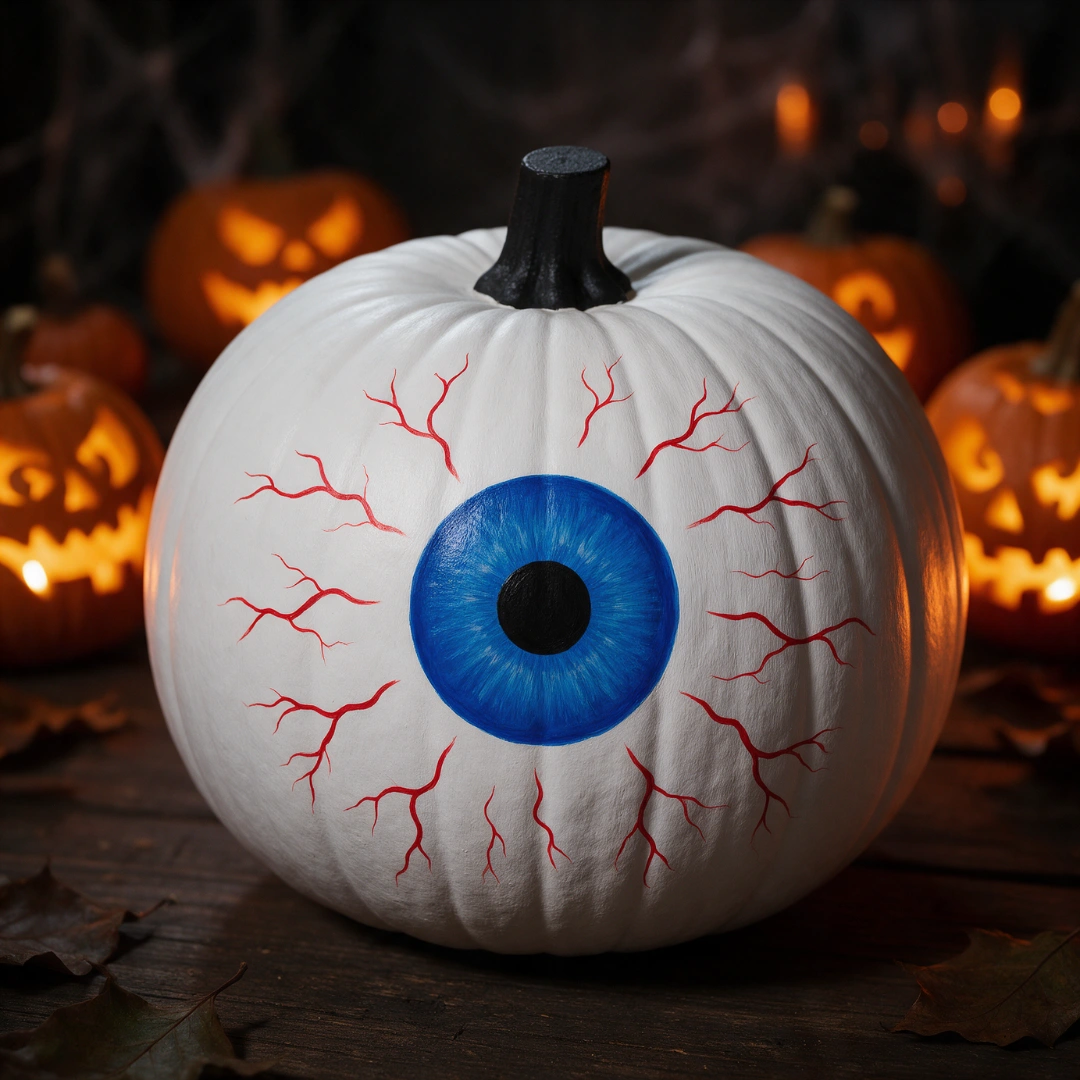
Paint the whole pumpkin white, then add one large circle in a bright color for the iris and a smaller black circle centered inside it for the pupil.
A handful of thin red lines fanning out from the edges toward the center finishes the look without adding much extra work.
This design turns the entire pumpkin into a single feature instead of a full face.
Pick Your Pumpkin, Skip the Mess
Halloween painted pumpkins give you everything a carved one does, minus the smell, the seeds, and a knife anywhere near small hands.
Start with one simple design if this is your first year, or work through a few from this list for a full porch display.
Paint dries faster than you think, and a mistake just means starting over with a fresh coat. My family repaints ours every week or two once the kids get bored, so do not feel locked into one look.
Pick a design, grab your paint, and get started this weekend.
Frequently Asked Questions
1. Can You Paint Real Pumpkins?
Yes. Acrylic paint and other water based craft paints work well on a real pumpkin as long as the surface is clean and dry first.
2. Do You Need to Prime a Pumpkin Before Painting?
Not always. A thin base coat helps light colors show up more evenly, especially over an orange pumpkin, but it is not required for darker colors.
3. How Long Do Painted Pumpkins Last?
A pumpkin with no soft spots or cracks can often last several weeks, though that depends on the weather and how it is stored. Keeping it out of direct sun and rain helps it last longer.
4. Can Kids Paint Halloween Pumpkins?
Yes. Simple designs like dots, ghosts, and basic faces are easy enough for most kids to handle on their own, with an adult around for anything that needs a paint pen or fine detail.